Get in touch with UD Packaging Company

Updated August 24, 2026
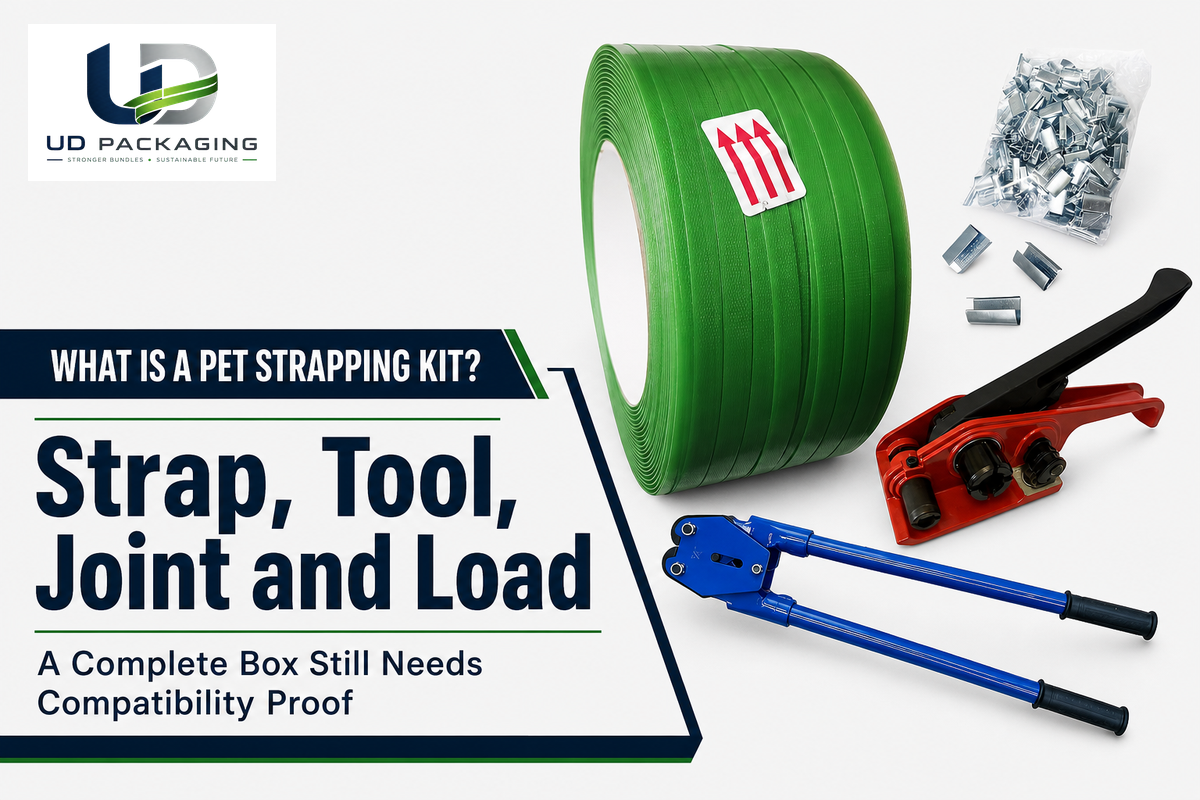
A PET strapping kit is a working system for tensioning and joining polyester strap around cartons, bundles, or palletized loads. Typical manual contents include a strapping roll, tensioner, sealer, metal seals or buckles, a cutter, a dispenser, and corner protection. That list is useful, but it does not prove that the parts are compatible.
What matters in pallet strapping and other industrial banding work is whether the strap, tool, joining method, and load interface work together. This guide explains that chain, then shows how to document setup, conduct a sample run, and diagnose common symptoms. If you need available configurations, supplier documentation, or a quotation, those commercial details remain on the dedicated solution page rather than being repeated here.
The short answer
Treat the kit as a compatibility chain. Verify the strap dimensions and material, the tensioner’s working range, the joining method, the matching seal or weld path, the cutter and dispenser, and the way the strap contacts the load. Then approve the finished joint and representative shipping unit against your own documented criteria.
What Is a PET Strapping Kit?
PET stands for polyethylene terephthalate, the polymer commonly described in this application as polyester. PET strapping is used for industrial bundling and pallet packaging where the strap, joint, and load arrangement are designed to remain stable through handling and shipping. It is different from polypropylene and steel strapping, and those materials should not be treated as automatically interchangeable just because a supplier groups them under a broad strapping label.
Manual strapping kits usually divide the work among several components:
- Strap — wraps the package and carries the applied tension.
- Tensioner — pulls the strap to the approved operating condition.
- Sealer and seals — crimp overlapping strap ends with compatible smooth or serrated seals, as specified for that strap and sealer.
- Buckle — provides a different joint path for systems designed around a buckle.
- Friction-weld strapping tool — tensions and joins compatible plastic strap without a separate metal seal.
- Cutter and dispenser — manage the tail and coil so the strap feeds cleanly.
- Corner or edge protection — manages contact between the strap and vulnerable or sharp load edges.
Some combination tools perform tensioning, joining, and cutting in one body. Others separate those operations. Neither architecture is automatically better. What controls the choice is the approved strap range, joint method, workload, operator interface, and evidence required by the application.
That is why a complete box can still be an incomplete solution. One tensioner may accept the strap width but damage its surface. Even a comfortable sealer can produce the wrong crimp for the supplied seal. Sound joints can still sit over a sharp edge or on a load that settles after strapping.
Use the Compatibility Chain Before You Open the Box
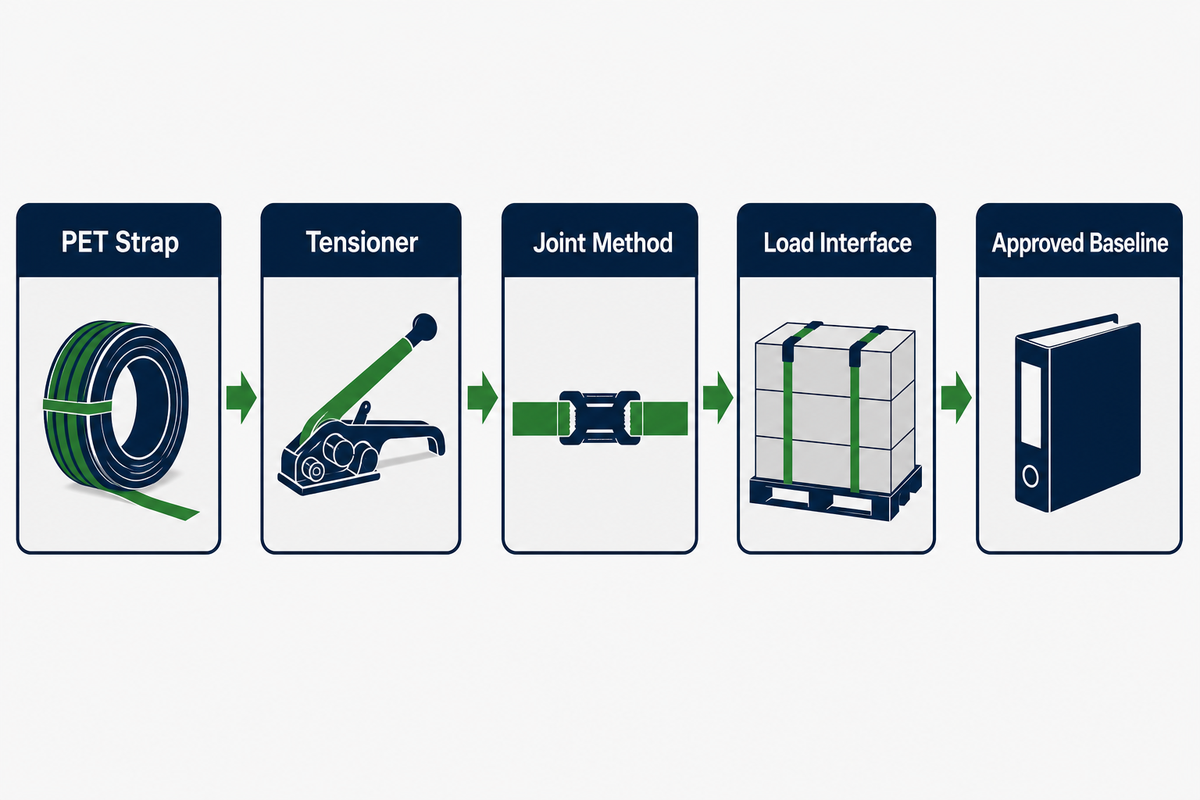
The PET Kit Compatibility Chain
Start with a declared application, not a shopping list. This named chain helps procurement, packaging engineering, and quality teams ask the same questions before the kit reaches the line.
| Link in the chain | Specification or range to verify | Evidence to keep | Possible mismatch signal |
|---|---|---|---|
| Strap | PET material, width, thickness, surface, coil format, declared strength and elongation basis | Lot identity, supplier data, buyer specification, test method and edition | Poor feed, surface damage, unexpected stretch or early break |
| Tensioner | Model, rated strap range, tension-control method, cutter condition and service state | Nameplate, manual revision, inspection or service record | Binding, slipping, fraying, uneven tension or difficult release |
| Joining method | Seal, buckle, heat, or friction-weld path defined for the strap and tool | Consumable identity, approved setting or program, joint inspection method | Seal slip, poor crimp, peeling weld or inconsistent joint |
| Seal, buckle, or weld head | Dimensions, geometry, orientation, condition and compatibility with the chosen strap | Part identity, tool range, approved sample joint | Partial crimp, crushed strap, weak weld or difficult tool removal |
| Dispenser and cutter | Coil fit, brake or feed behavior, workstation position and blade condition | Pre-use check and replacement history | Kinks, uncontrolled payout, contaminated strap or frayed tail |
| Load interface | Pallet condition, edges, surface friction, settling, strap path, corner protection and handling method | Representative load description, photos and post-handling observations | Cut strap, lost tension, shifted protector or unstable unit |
| Operator and method | Training, manual revision, body position, approved sequence and workload | Training record, work instruction and observed trial | Variable joints, unsafe posture, missed inspection or uncontrolled cut tail |
| Change control | Replacement parts, strap lot, settings, load geometry and production method | Approved baseline, change log and revalidation decision | A previously stable process changes without an obvious machine fault |
Break strength is not completed-loop strength
Break strength describes the strap body under a stated test basis. Joint strength concerns the connection between the overlapping ends. In practice, the completed loop can be limited by the joint, tool damage, edge contact, strap path, or the load itself. “Choose a stronger strap” is therefore not a complete troubleshooting or approval rule.
ASTM’s public scope for ASTM D3950-23 reinforces this distinction: it covers nonmetallic strapping and joining methods and treats breaking strength, elongation, and joint strength as separate properties where applicable. That standard is an acceptance framework for materials and joints; it is not certification of a particular kit or shipping unit.
Tool working windows are equally specific. For example, one documented industrial friction-weld tool has a defined PET strap dimension range and maximum tension capability. Buyers should not copy that model’s values; they should demand the same clarity for the tool they will actually use.
Set Up and Operate the Kit Safely
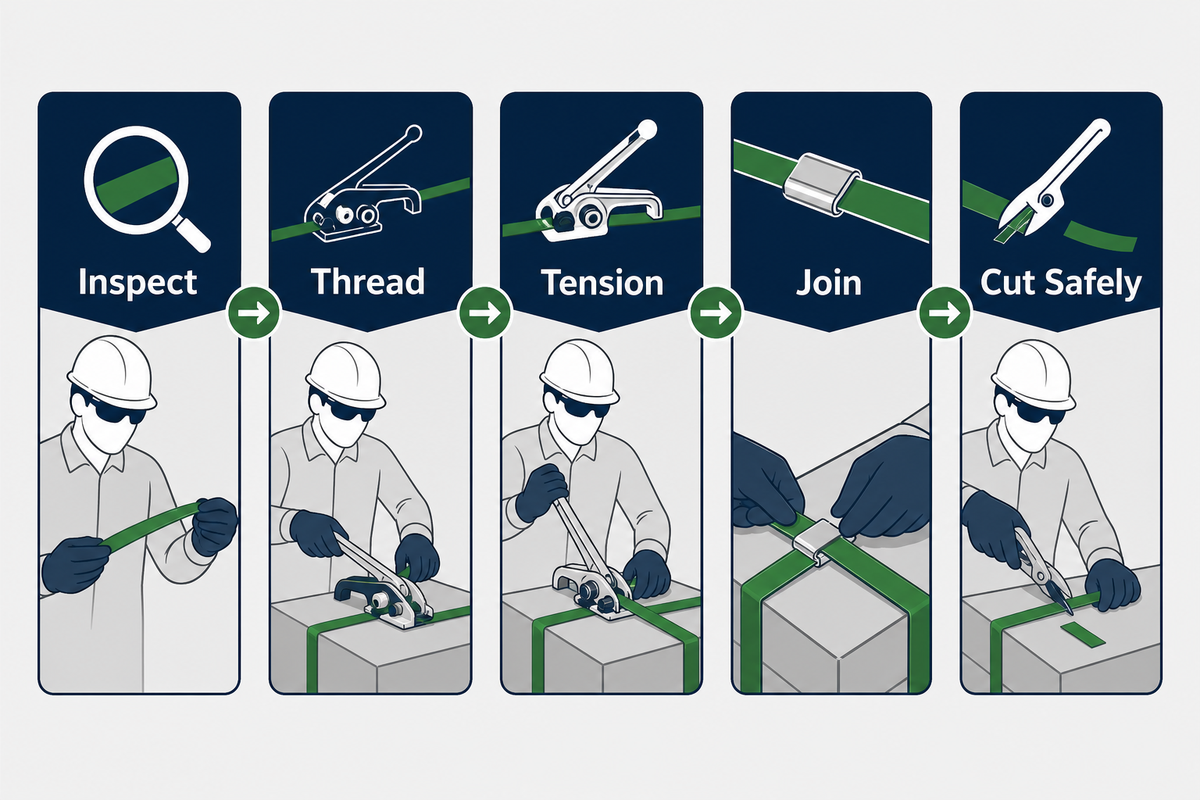
Follow the applicable tool manual as the controlling procedure. For orientation, the sequence below describes a conventional manual tensioner-and-sealer path; it does not replace model-specific instructions, training, guarding, or workplace risk assessment.
- Confirm identity. Match the strap, tensioner, sealer, seal or buckle, and cutter to the approved trial record. Stop if a part or setting has changed without review.
- Inspect before use. Look for a damaged blade, worn gripping surface, loose hardware, contamination, damaged seals, or strap that has been kinked or cut.
- Prepare the load interface. Confirm pallet condition, strap path, edge protection, and clearance. Do not ask the strap to compensate for an unstable base or sharp, unprotected edge.
- Thread according to the manual. Keep the strap flat and untwisted. Confirm that the overlap and tail position suit the intended joining method.
- Apply tension progressively. Watch the strap, tool, protectors, and load. Use the approved model setting or method; do not keep increasing tension because a joint or load looks uncertain.
- Form and inspect the joint. Place and crimp the seal as instructed, or complete the friction-weld cycle exactly as the applicable tool manual specifies before removing the tool.
- Control the cut tail. Position yourself outside the recoil path, control the released end, and leave a clean result that does not create a handling hazard.
Operator safety boundary
One public manual for a polypropylene/polyester tensioner instructs users to wear eye, face, and hand protection; keep body parts out from between the strap and package; avoid standing in line with the strap during tensioning; and control the upper portion when cutting because the released strap can snap forward. Apply the manual for your own tool and your site’s risk controls.
Kleton’s model-specific tensioner instructions also describe cleaning and lubrication. Those directions should not be generalized into a universal maintenance schedule. For powered equipment, service or maintenance that can expose a worker to unexpected startup or hazardous-energy release needs the applicable site procedure; in U.S. general industry, OSHA 29 CFR 1910.147 defines the scope and minimum energy-control requirements. The tool manual and local rules still govern the actual machine and jurisdiction.
Approve the Kit With a Sample-Run Record
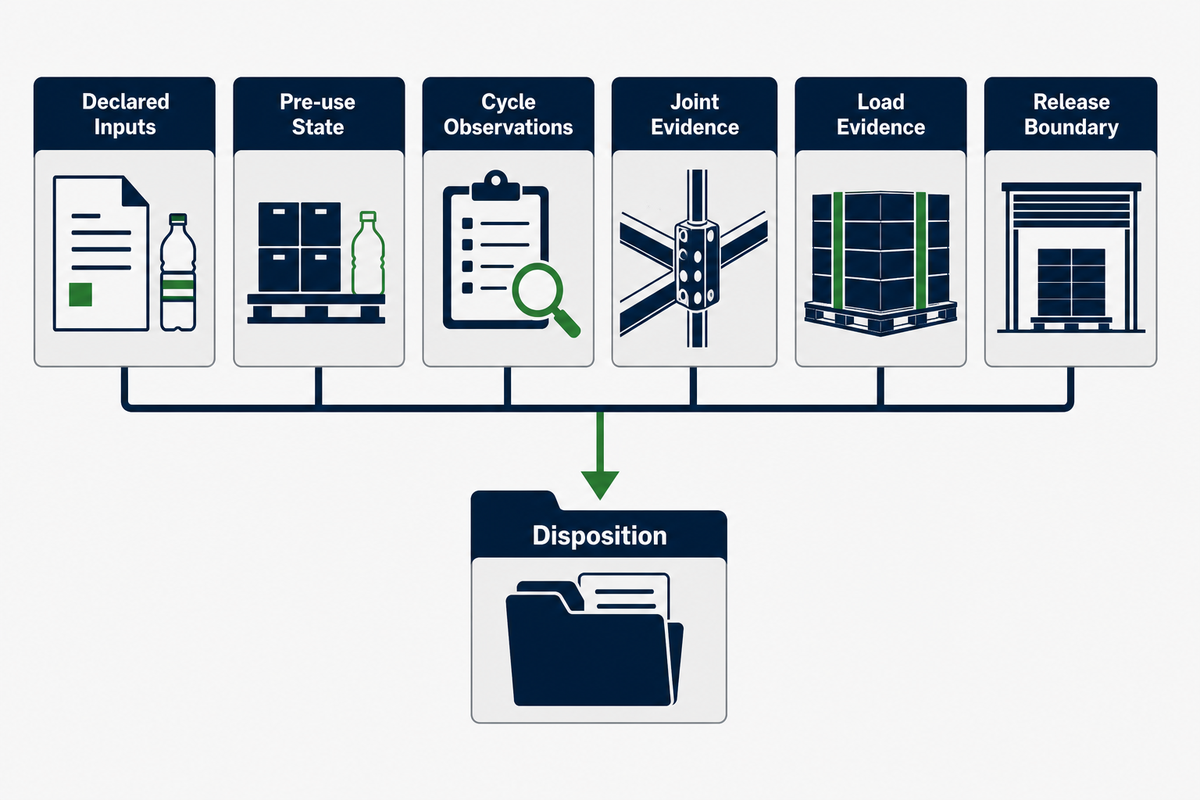
The Sample-Run Proof Record
Completing a tool cycle is not proof that the joint or shipping unit is acceptable. Before production release, run the actual combination on a representative load and retain enough information to repeat the decision. Your quality plan, customer requirement, transport method, and applicable standard determine the sample quantity and pass criteria; this guide does not invent a universal threshold.
| Record | What to capture | Decision question | Owner |
|---|---|---|---|
| Declared inputs | Strap material, dimensions and lot; tool and range; joining method and consumable; load and pallet identity | Are these the exact parts and conditions under review? | Procurement / engineering |
| Pre-use state | Manual revision, inspection result, approved setting or method, edge protection and operator readiness | Was the trial started from a controlled condition? | Operator / maintenance |
| Cycle observations | Feed, alignment, tension response, tool release, cut quality and abnormal sound or movement | Did the process remain consistent without damaging the strap? | Operator |
| Joint evidence | Joint position, visual condition, repeatability and any required test result with its method and edition | Does the completed joint meet the declared acceptance basis? | Quality |
| Load evidence | Strap path, edge contact, settling, protector movement and condition after representative handling | Did the shipping unit remain stable under the approved trial? | Packaging engineer / quality |
| Change response | Any difference from the approved input, setting, load, joint method or handling route | Does the change need revalidation before release? | Engineering / quality |
| Release boundary | Products, loads, sites, operators and routes covered by the decision | Is the approval scope written narrowly enough to reproduce? | Authorized approver |
| Disposition | Accepted, conditional, or rejected; open gaps; responsible owner; next review trigger | Can this exact combination be released and reproduced? | Authorized approver |
If the trial reveals a gap in strap dimensions, tool range, joining method, load contact, or evidence, return to the application inputs. Readers who need a supplier-side configuration review can review a matched PET strapping kit on the existing solution page. That page remains the place for configurations and commercial follow-up.
Request a Compatibility Review
Troubleshoot PET Strapping by Symptom
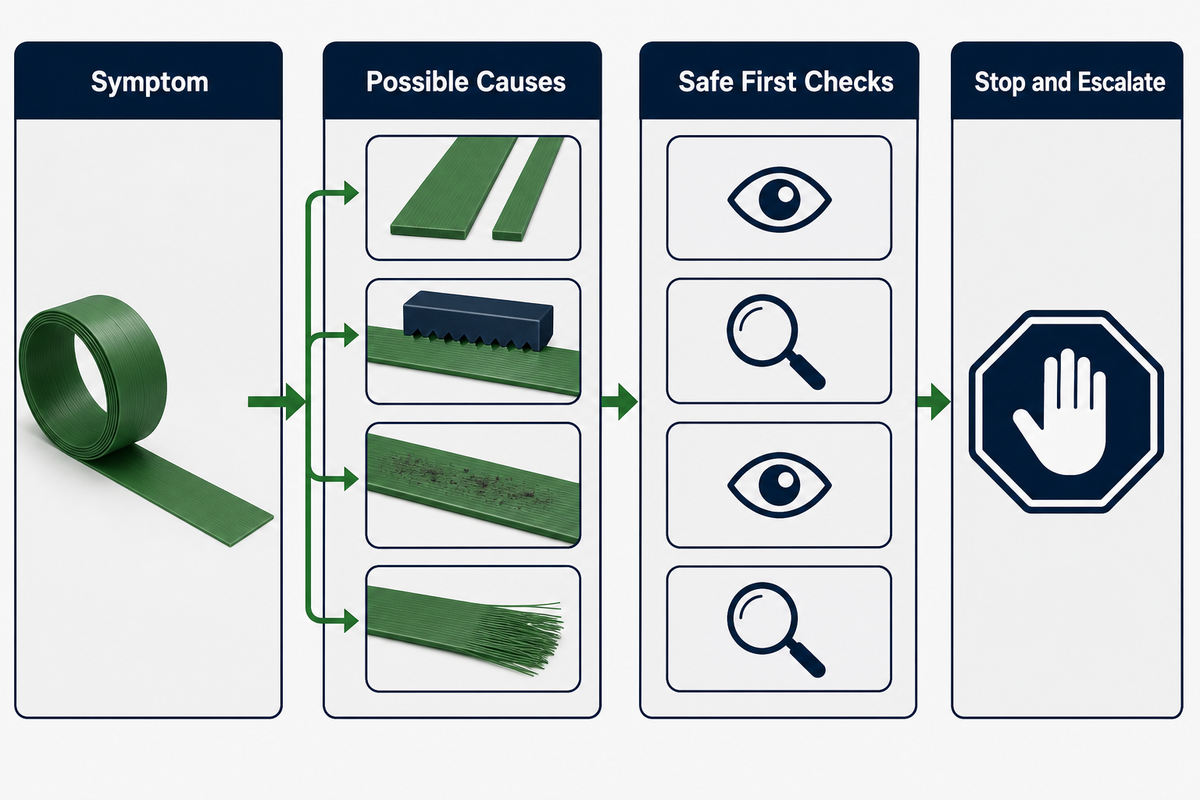
The Symptom-First Troubleshooting Matrix
Troubleshooting should begin with the observable symptom and the last controlled baseline. Do not assume that every loose strap needs more tension or every weak joint needs more weld energy. Those changes can hide a compatibility problem or damage the strap.
| Symptom | Possible causes | Safe first checks |
|---|---|---|
| Strap will not feed or binds | Wrong width or thickness, twisted path, contamination, worn gripper, damaged guide | Stop, unload safely, confirm strap identity and tool range, inspect the path and follow the manual |
| Strap breaks during tensioning | Over-tensioning, sharp load edge, damaged strap, burr or wear in the tool | Stay outside the strap line, inspect the break location, edge protection, strap surface and tool contact points |
| Seal slips or crimp varies | Wrong seal, incorrect orientation, sealer mismatch, incomplete closure, wear | Confirm the seal and strap identity, review orientation and inspect the approved sample-joint pattern |
| Friction weld peels or varies | Material or thickness mismatch, dirty surfaces, worn weld parts, incorrect approved program | Isolate as required, confirm strap range and program, clean or service only as the manual allows, repeat the governed joint check |
| Strap loosens after handling | Load settling, protector movement, poor surface contact, unsuitable strap path, joint slip | Compare with the trial record, inspect the load and joint separately, and review the complete containment method |
| Cutter frays the tail | Worn blade, incompatible thickness, contamination, incorrect release motion | Remove the tool from service if damaged; inspect and replace parts according to the manufacturer’s instructions |
Stop the trial when the tool is damaged, the strap repeatedly breaks, a joint cannot be inspected consistently, or the required setting falls outside the approved range. Escalate the exact symptom, input identity, photos, and trial record instead of sending the vague message “the kit does not work.”
Maintain the Kit and Control Its Documentation
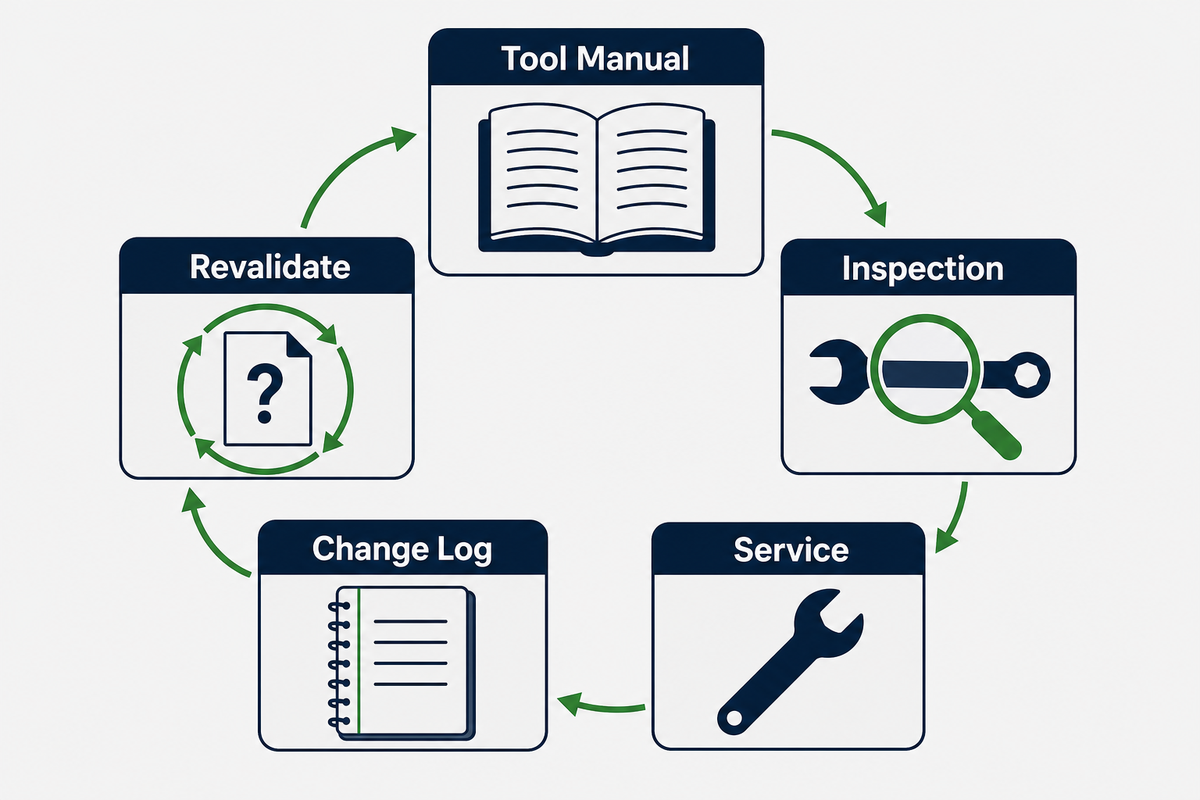
Process stability depends on knowing what changed. Keep the approved strap, joint, and tool identities close to the workstation. Record service or replacement of gripping, sealing, welding, and cutting parts. If operators switch coil format, strap dimensions, seal type, weld program, tool model, pallet, edge protector, or load geometry, decide whether the sample-run evidence still applies.
For a manual tool, cleaning and lubrication must follow its own instructions. One public tensioner manual calls for periodic cleaning and light-machine-oil lubrication of moving parts. That model-specific direction does not set the interval for a different tool.
Keep these records together
- current tool manual and approved operating method;
- tool model, rated strap range, service status, and parts history;
- strap specification, lot identity, storage condition, and supplier test data;
- seal, buckle, or weld-program identity;
- operator training and pre-use inspection record;
- sample-run evidence and the scope of its approval;
- change log for the load, pallet, corner protection, and transport method;
- applicable test method, standard edition, units, and acceptance criteria.
Verify standards by edition, not by habit
Standards change. Official Chinese standards records show that GB/T 1040.1-2025 replaced GB/T 1040.1-2018 and became effective in 2025. During this workflow, the official record for GB/T 1040.3-2006 still showed it as current. Check the edition in force on the actual test date and confirm that its scope fits the specimen and claim.
Material tensile tests, joint tests, and representative shipping-unit trials answer different questions. Keep each result attached to its method and scope. Do not turn one passing number into a blanket approval for every strap, tool, pallet, load, or route.
Frequently Asked Questions
Is PET strapping the same as polyester strapping?
Yes, in industrial packaging, PET strapping normally refers to polyester strapping made from polyethylene terephthalate. It should not be confused with polypropylene, often abbreviated PP, or with woven and composite cord strap. Material name alone is not a full specification: width, thickness, surface, coil format, strength basis, elongation, and intended joining method still need to match the application and tool.
Can every PET strap work with every tensioner or sealer?
No. Tools have rated strap-material and dimension ranges, and sealers are designed around particular seal geometries and strap combinations. Even when a strap enters the tool, it can feed poorly, suffer surface damage, or form an inconsistent joint during setup or production.
Confirm the nameplate and manual, then trial the exact strap, tool, seal or weld path, and load instead of relying on the shared “PET” label.
Is break strength the same as joint strength?
No. Break strength describes the strap body under a stated test method, while joint strength concerns the connection between the overlapping ends. In a finished loop, the seal, buckle, weld, tool contact, edge condition, or load behavior may become the limiting factor.
A high catalogue value therefore cannot prove that the installed joint is acceptable. Keep the strap result and joint result separate, identify the method and edition behind each one, and record how the representative load behaved. If the joint is tested, use the acceptance requirement declared for that application rather than importing a percentage or safety factor from an unrelated product page.
How do I know whether a sample run passed?
Your sample run passes when the declared strap, tool, joint, load, and handling conditions meet the acceptance criteria approved for that application. A useful record identifies the material lot, tool and joining path; documents the pre-use condition and operator; describes joint consistency and any required test; shows what happened to the representative load after handling; and names the person who authorized release.
It also states the boundary of that approval, so a different pallet, strap, tool, load geometry, or transport route does not inherit the result automatically. There is no credible universal sample count or single pass percentage for every load.
When should I move from a manual kit to a powered system?
Review a powered path when production rate, repeatability, operator workload, joint consistency, data capture, or line integration can no longer be controlled adequately with the manual method. That decision still begins with the strap and load, not the tool’s marketing category. Document current cycle demand, approved tension and joint method, operator concerns, utilities, guarding, maintenance capability, and the evidence the new system must reproduce. Use those records to compare repeatability and workload before approving a change in production method.
A useful handoff is specific
Send the strap dimensions and lot, tool model and rated range, joining method, seal or weld identity, load and pallet description, edge protection, observed symptom, and sample-run evidence. That package gives engineering, quality, maintenance, and the supplier the same starting point.