Get in touch with UD Packaging Company

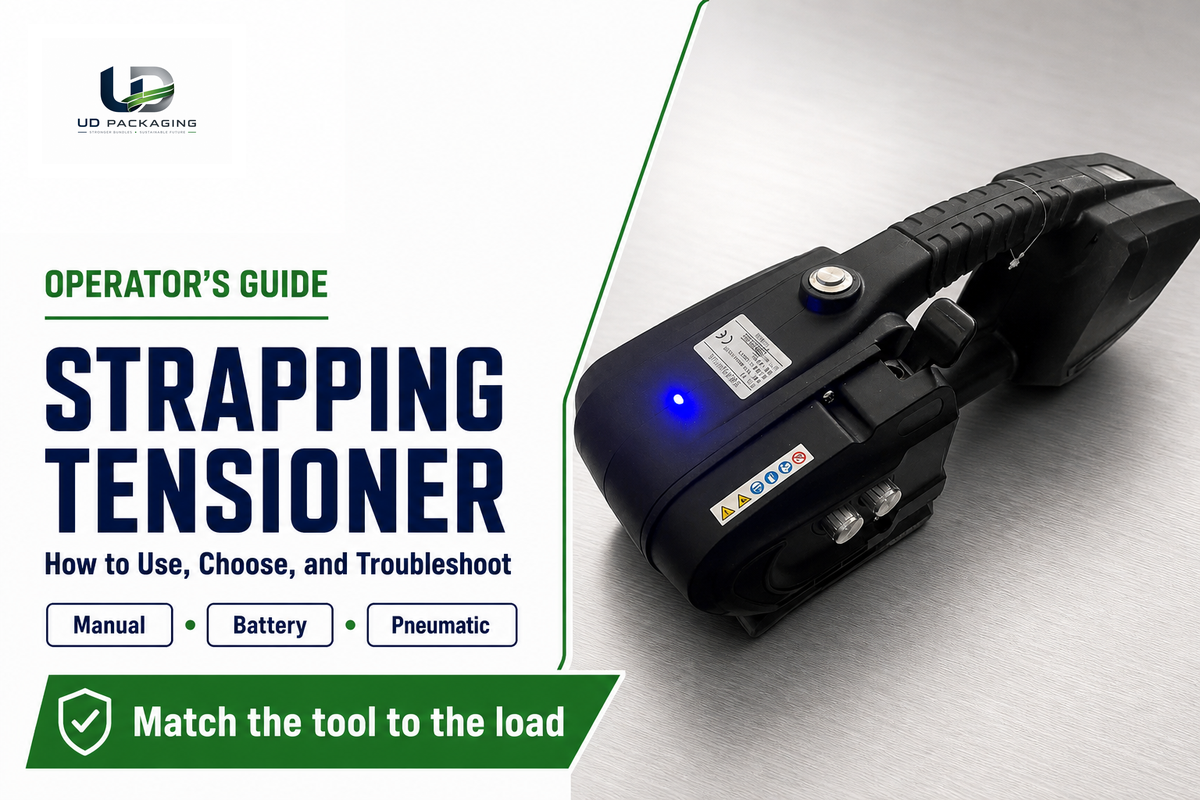
Quick Specs
| Tool type | Hand-held (manual, battery, or pneumatic) |
| Strap width range (across all types) | 1/4 in (6.4 mm) to 3/4 in (19 mm) for poly/cord; 3/8 in (9.5 mm) to 1-1/4 in (32 mm) for steel — most manual windlass/ratchet models run 1/2 in (12.7 mm) to 3/4 in; narrower widths need a pure-gripper or battery model |
| Typical use case | Pallet, carton, and unit-load securement before shipment |
| Not the same as | A strapping machine, which automates feed/tension/seal/cut in one unit |
A strapping tensioner is a manually operated tool that takes tension out of a strap and adds controlled tightness before sealing; it’s effectively the strapping technique you see in just about all manufacturer YouTube demonstrations – however, seeing them work doesn’t replace practicing on waste straps. Master operating this machine correctly – don’t just crank it down at all costs – and you get a product that makes it through transport undamaged versus one with broken straps or shattered corners. Here are the ins and outs of operation for this machine, when to pair a tensioner with a given strap, the safety guidelines observed on a dock, and how to diagnose a problem that’s often blamed on damaged equipment, so you can learn how to use a strapping tensioner correctly whether you’re using a manual or powered model.
A strapping tensioner functions to lock one end of the strap into some form of gripper or feed-wheel, and then hand or motor winds or ratchets the free strap into place until the strap is sufficiently stretched, at which point the strap connection point is sealed either with some part of the tensioning device itself or a separately connected strapping sealer tool. The tool simply tightens – it doesn’t and can’t by itself ensure the readiness of a load for shipping, as load security often includes aspects such as those discussed earlier along with subsequent verification of tightness etc.
What Is a Strapping Tensioner?
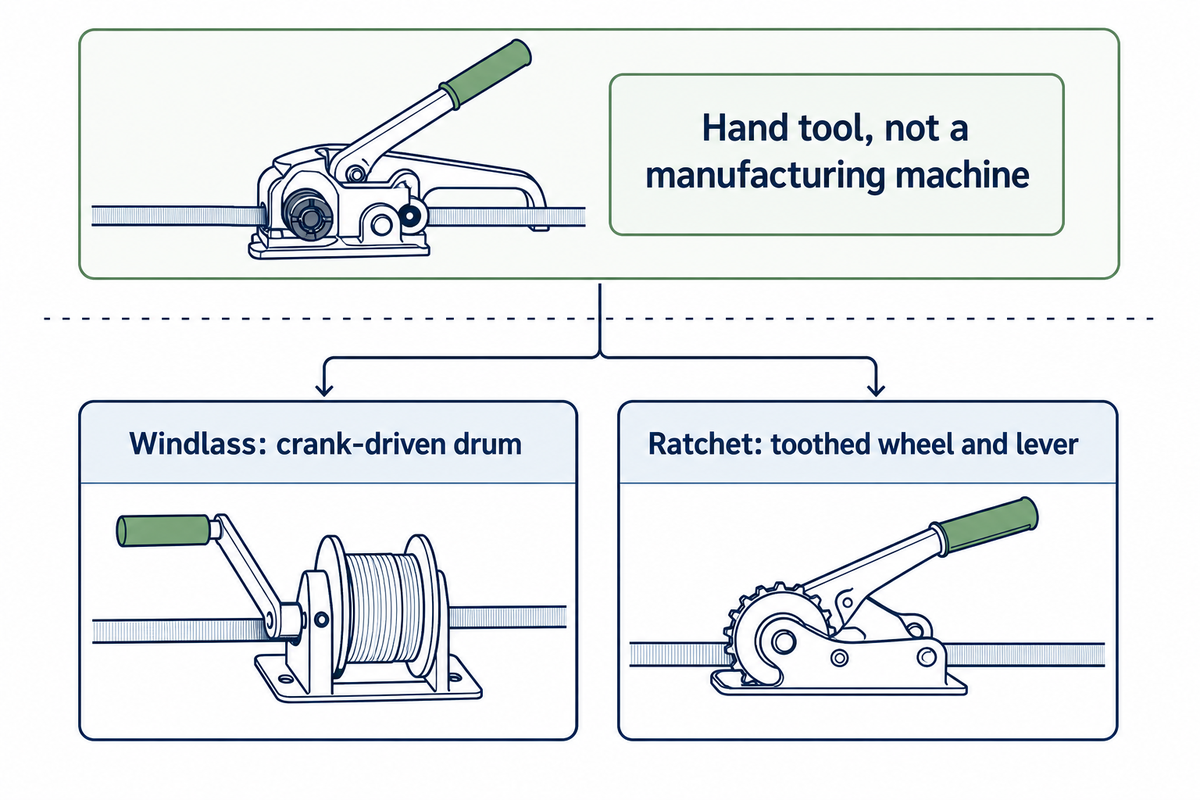
A strapping tensioner isn’t a manufacturing machine — it’s a hand tool that pulls tension into plastic or steel strap wrapped around a load. Windlass tensioners use a crank-driven drum that coils the strap while a pawl blocks it from unwinding. Ratchet tensioners use a toothed wheel that a lever advances forward, gripping the strap and locking it in place once you stop pumping.
Manual windlass and ratchet tensioners are a well-established, widely stocked tool category — general industrial distributors and dedicated strapping-tool manufacturers alike carry them.
A strap tensioner isn’t the same as a strap machine – one ends at the hand tool interface where strapping machine integration takes over. At best, one functions as one part of the other; at its worst, either could be used, although for vastly different process ends and varying efficiencies. Likewise, strap material generally falls into two categories, each covered by a separate material specification: nonmetallic (plastic) strapping and joining under ASTM D3950-23, while flat steel strapping and seals fall under ASTM D3953-15(2022).
| Type | Mechanism | Typical strap width | Power source | Not suitable for |
|---|---|---|---|---|
| Manual windlass (poly) | Drum-and-axle winding | 1/2–3/4 in (12.7 mm–19 mm) | Hand crank | High-volume lines (>50 straps/hr) |
| Manual ratchet (poly/cord) | Toothed wheel + lever | 1/2–3/4 in (12.7 mm–19 mm) | Hand lever | Steel strap (insufficient force) |
| Manual windlass (steel) | Drum-and-axle winding, heavier frame | 3/8–1-1/4 in (9.5 mm–32 mm) | Hand crank | Repetitive high-tension jobs (operator fatigue) |
| Battery-powered (poly) | Motor-driven feed-wheel | 1/4–3/4 in (6.4 mm–19 mm) | Battery, cycles/charge vary by model (e.g. Signode BXT4 up to ~800) | Occasional/low-volume use (cost not justified) |
| Pneumatic (steel) | Air-driven feed-wheel | 3/8–1-1/4 in (9.5 mm–32 mm) | Shop compressed air | Sites without existing air-line infrastructure |
| Combination tensioner-sealer (poly) | Gripper + built-in crimp sealer | 1/2–5/8 in (12.7 mm–15.9 mm) | Manual or battery | Very wide strap (>3/4 in) or steel |
| Feed-wheel gripper (high-tension steel) | Feed-wheel, not pure gripper | 3/8–1-1/4 in (9.5 mm–32 mm) | Manual, battery, or pneumatic | Budget-limited light-duty jobs |
| Pure-gripper tensioner (light poly) | Gripper only, no feed-wheel | 1/4–1/2 in (6.4 mm–12.7 mm) | Manual | High tensile force (see gripper slippage, below) |
| Semi-automatic tabletop (mixed) | Triggered cycle (start-switch/photoeye/footbar) | 1/4–3/4 in (6.4 mm–19 mm) | Electric | Floor-level or oversized loads (see machine guide) |
How to Use a Strapping Tensioner: Step-by-Step
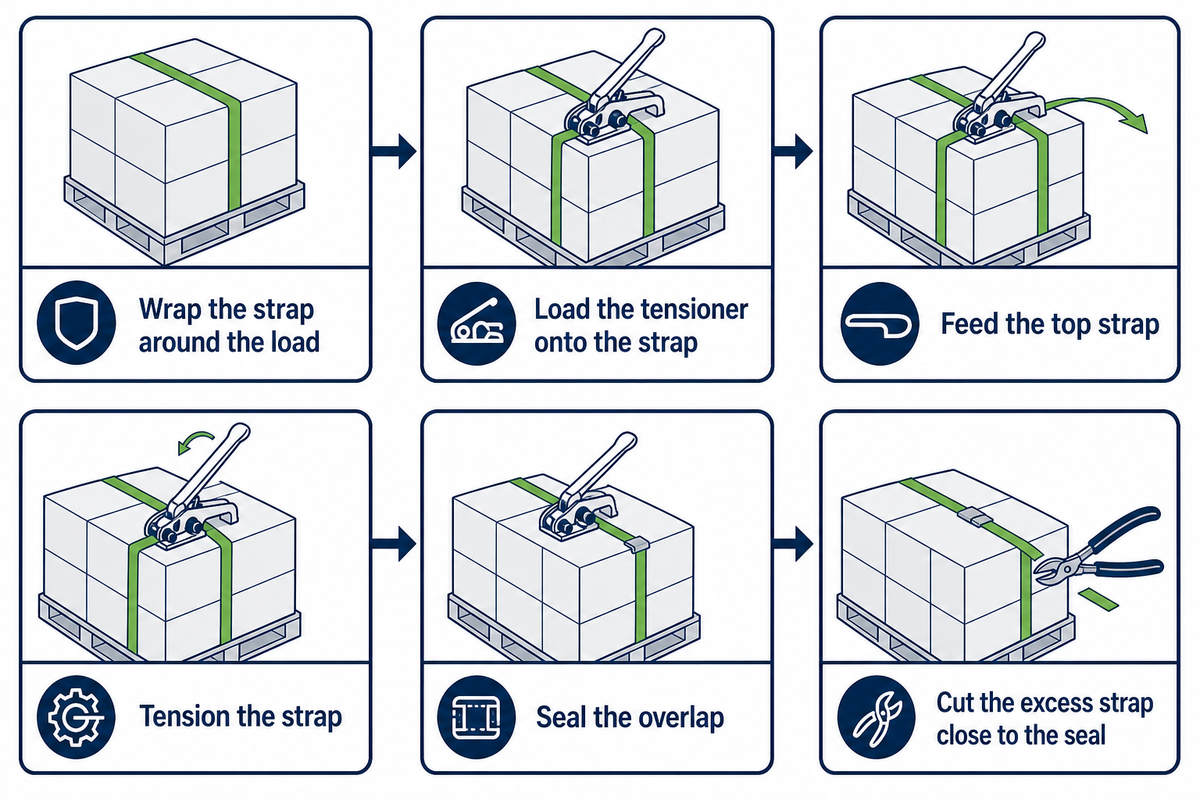
Squeeze the handle to lift the gripper, thread the strap through, crank or ratchet until snug, then seal and cut, that’s the operating sequence behind how to use a strapping tensioner on virtually any manual or powered model. The steps below describe the general sequence; exact tension and configuration should still be validated against your own package, since strap selection and applied tension are meant to be confirmed for your specific load rather than assumed from a generic table.
Poly (PP/PET) Strapping
Whether you use polyester strapping (PET) or polypropylene (PP), the core sequence below works across the 1/4 in to 3/4 in strap-width range covered in the Quick Specs above:
- Wrap the strap around the load with the strap tail (the coil end) overlying the fixed end and running the strap underneath the load. Pull it up to a hand tight tension while using your other hand to advance the remaining strap, buckle or seal side facing out, so it loops under the fixed end that will be clamped by the tensioning mechanism.
- Load the tensioner onto the strap: slide the tensioner forward so the stationary jaw sits near the front of the tool, hold the ratchet tension lever and gripper body firmly together, slide the strap under the stationary jaw leaving a 3-5 inch gap for the eventual crimped/cut junction, then release the levers so the strap locks into the tensioning mechanism at the back of the tool.
- Feed the top strap through the tensioner blade and into the roller or ratchet mechanism and pull taut with hand pressure before using the tension crank.
- Tension: Apply stress to the moving lever on the tensioner to tension the strap around the load. Continue to pump and stroke the lever until the strap is snug against the entire cargo. DO NOT exhaust the tool to maximize stroke length!
- Seal: apply a buckle/clip just in front of the nose of the tensioner over the overlapped straps and crimp with a separate sealer tool or the combined crimper/sealer mechanism of a combi unit.
- Cut and release: activate the cutting tool for steel strapping / the combined sealer and cutter tool for polyesters (OSHA’s cutting-tool rule, discussed further below, specifically refers to metal strapping only – if you use metal strapping all cutting must be by mechanical means that don’t involve prying or bending, as this can lead to lacerations from snapped or flinging segments); cut the excess strap close to the seal, then remove the tensioner and release tension on the strap.
Steel Strapping
Yes, the overall procedure for strapping will involve similar five fundamental strokes – in and through, seat the strap, tension, apply the seal, cut, but with metal tensioners you’ll almost always be operating the separate crimping tool rather than a combined sealer (although some newer units will combine them), and again, strapping is extremely stiff, thus taking up tension much more readily per pump action than does the more stretchable alternative material. Steel is also near-zero stretch – in contrast with PET strapping at a reported 10-12% of application stretchability, and PP strapping which can give even more (up to 34% reported under extreme loads, it usually is below that under most operational loads), steel doesn’t give over time – and only a dedicated cutting tool, never pliers or prying, should ever be used to cut metal strapping or banding (OSHA makes this a direct requirement in marine-terminal cargo work under 29 C.F.R. 1917.51(c), and it’s standard best practice elsewhere), in part because snapping steel strapping can prove exceptionally deadly.
Q: How do you tension a band with a banding tool?
You lock the free end of the strap in the tensioner’s gripper or feed-wheel, then crank a windlass or pump a ratchet lever until the strap is snug against the load.
There are two different types of strapping mechanisms on the market: a “windlass” tensioner winds the strapping around a rotating drum, with a pawl preventing the drum from unwinding once you stop cranking. A “ratchet” type mechanism instead holds tension with a lever that drives a toothed wheel forward, locking in place once you stop pumping. Both designs depend on the free end staying clamped in a gripper or fixed jaw – if that grip doesn’t bite evenly, the strap can slip rather than hold, which is the same mechanism behind the slipping problem covered below.
Choosing the Right Tensioner for Your Strap Material
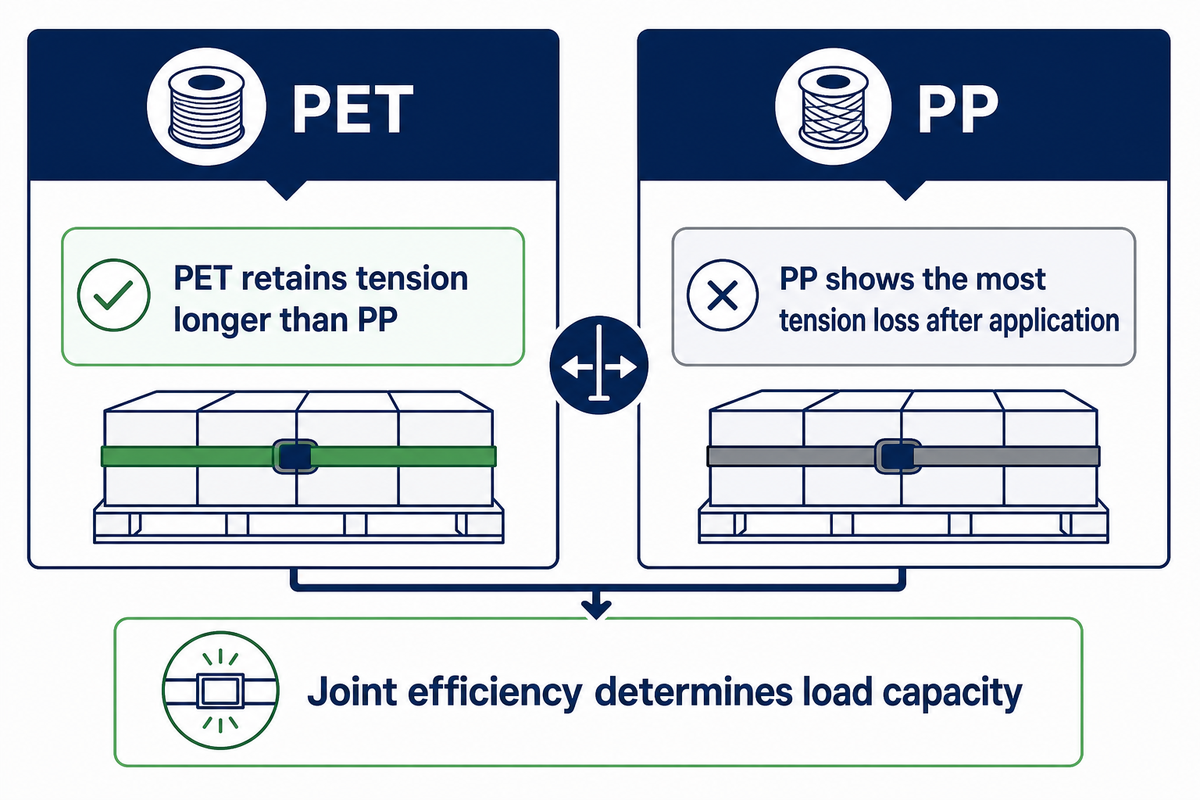
Your strap material changes both how much tension a tensioner needs to hold and how forgiving that hold needs to be over time. Except for steel, polyester (PET) strapping retains tension longer than polypropylene (PP); PP shows the most tension loss after application, with one vendor technical comparison reporting it losing around half its applied tension within the first 1–2 hours, while polypropylene also carries more elongation than PET or steel, illustrative vendor comparisons put PP elongation around 18–34%, PET and polyester cord around 10–12%, and steel near 1%. That single difference is why a PP-strapped load often needs a re-check sooner than a PET-strapped one, not because the tensioner failed.
RFQ checklist — copy these into your quote request:
| Parameter | Recommended range | Why it matters | How to verify |
|---|---|---|---|
| Strap material | PET for long tension retention; PP for lower cost, higher elongation | Retained tension differs by material (see above) | Cross-check against ASTM D3950-23 classification |
| Grade | Machine/systems-grade (no splices) vs hand/tool-grade (up to 1 splice/coil) | Splices can jam automated feed paths | Ask supplier for splice count per coil |
| Surface finish | Embossed → heat-seal tool; smooth/waxed → friction-seal tool | Mismatched surface/tool is a top beginner error | Confirm sealer type before ordering strap |
| Strap width | 1/4–3/4 in / 6.4–19 mm (poly); 3/8–1-1/4 in / 9.5–32 mm (steel) | Undersized gripper won’t seat correctly | Check tensioner spec sheet width range |
| Starting tension (opening pull before final cranking) | ~300–500 lbs for light loads (vendor rule-of-thumb, not a fixed standard) | This is the initial hand-tight pull, not the final secured load — too-low starting tension makes the strap hard to seat evenly as you crank toward minimum secure tension below | Test-tension a sample load, then adjust |
| Minimum secure tension (after full cranking, before sealing) | ~1,500 lbs typical minimum; 2,000+ lbs for heavier loads (vendor guidance, qualified) | This is the final target once tensioning is complete, well above the starting-tension figure above — below this range, straps commonly under-secure | Confirm with your strap supplier’s data sheet |
| Seal/joint type | Heat-seal (embossed strap) or friction-seal (smooth strap) | Joint efficiency, not bare strap force, sets usable load | Match seal type to strap surface before ordering |
| Power source | Manual, battery (cycles/charge vary by model), or pneumatic | Sets ongoing operating cost and throughput ceiling | Estimate straps/day against the Power-Upgrade Threshold |
| Governing standard | ASTM D3950-23 (nonmetallic) or ASTM D3953-15(2022) (steel) | Confirms current edition, avoids citing a superseded spec | Check edition year against ASTM/ANSI catalog listing |
It’s the joint efficiency, not the bare tensile strength, that determines the actual load capacity of the strap, and the headline ranking can invert against real-world usage — don’t assume the strap with the highest headline tensile rating is the strongest once you factor in the joint (the seal), which is why matching seal and tool to strap rating matters as much as the strap spec itself.
Manual, Battery, or Pneumatic: When to Upgrade
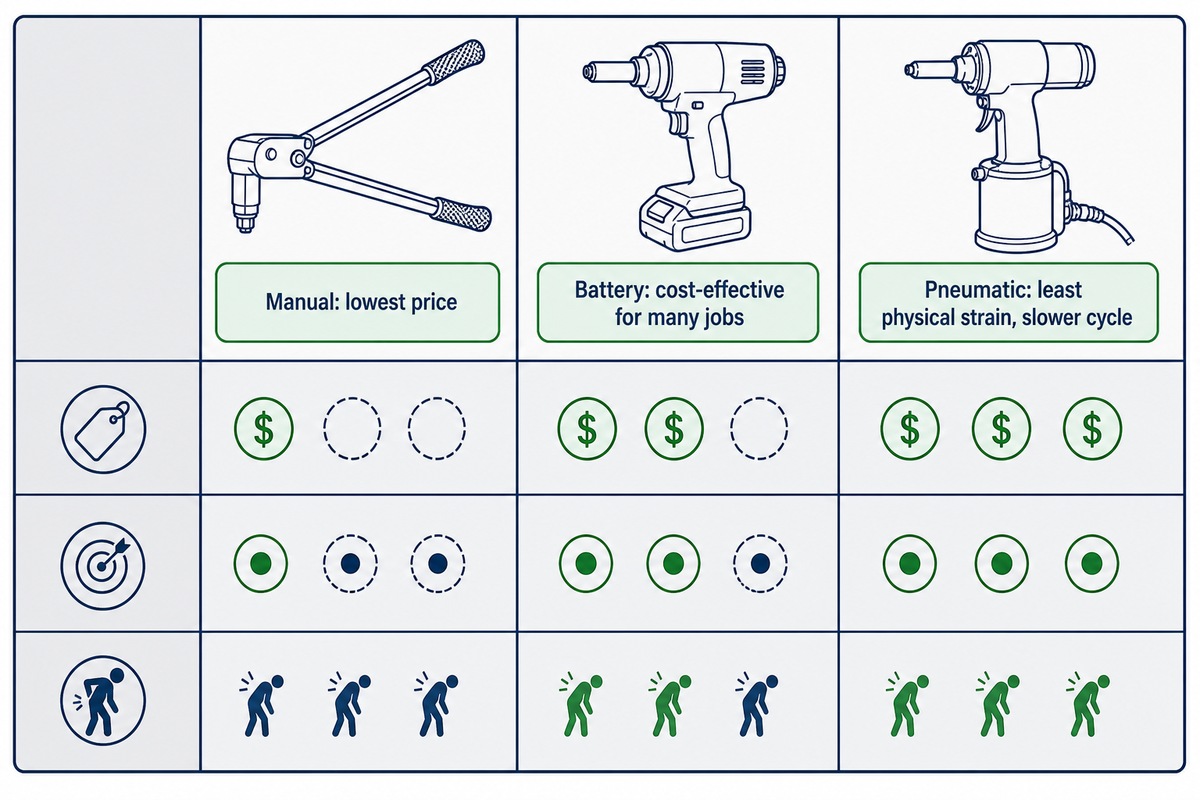
The Power-Upgrade Threshold isn’t really about the number of straps you handle each day so much as it’s about the point where tool price, operator time, and operator effort meet. At the low end, a manually operated tool has the lowest price and is a sound investment when you’re only strapping things occasionally and aren’t dealing with large workloads. Once you start taking on many strapping jobs throughout the day, however, a battery-driven hand tool becomes cost-effective, not only ensuring consistent tension but also reducing the operator-level effort required.
Searches for battery-powered strapping tools have also grown about 23% year-over-year per keyword search-volume trend data, and trade coverage has shown some commitment, like the release of Signode’s BXT4 battery strapping tool, which is reported to perform up to 800 cycles on a single battery and has an ergonomic, low-activation force trigger. It’s an indicator of intent – an indicator that many of the highest-volume applications that still don’t have a powered strapping tool present may soon – but not a reason to declare battery tools universally available for every operator.
⚠️ Important, powered isn’t automatically better
A NIOSH-affiliated study of a bulk-container sealing task (a pneumatic cable-tie gun, not a strapping tensioner) found the pneumatic tool caused the least physical strain, but took roughly 33% longer per cycle than doing the same joint with no tool at all – there was no clear overall winner for all aspects evaluated. If work rate and not muscle strain is the issue it’s still wise to time your own procedures head-to-head before assuming power is quicker. For high work-rate shifts, the UK’s hand-arm vibration guidance gives an action level and exposure limit of 2.5 m/s² A(8) and 5 m/s² A(8) respectively for powered hand-held tools, worth considering when evaluating repeated exposure.
Sealing After Tensioning: Matching Seal Type to Tool
Straps need to match not just the seal grade and method – but the joint. You can wind up with the joint, rather than the tensioner, being your weakest link if you have this mismatch. Machine or systems grade strapping is made without splices for fast, automatic operation, whereas strap made for hand or tool use may tolerate up to one splice per coil – okay for a human to pull down, a disaster in an automatic feeding system.
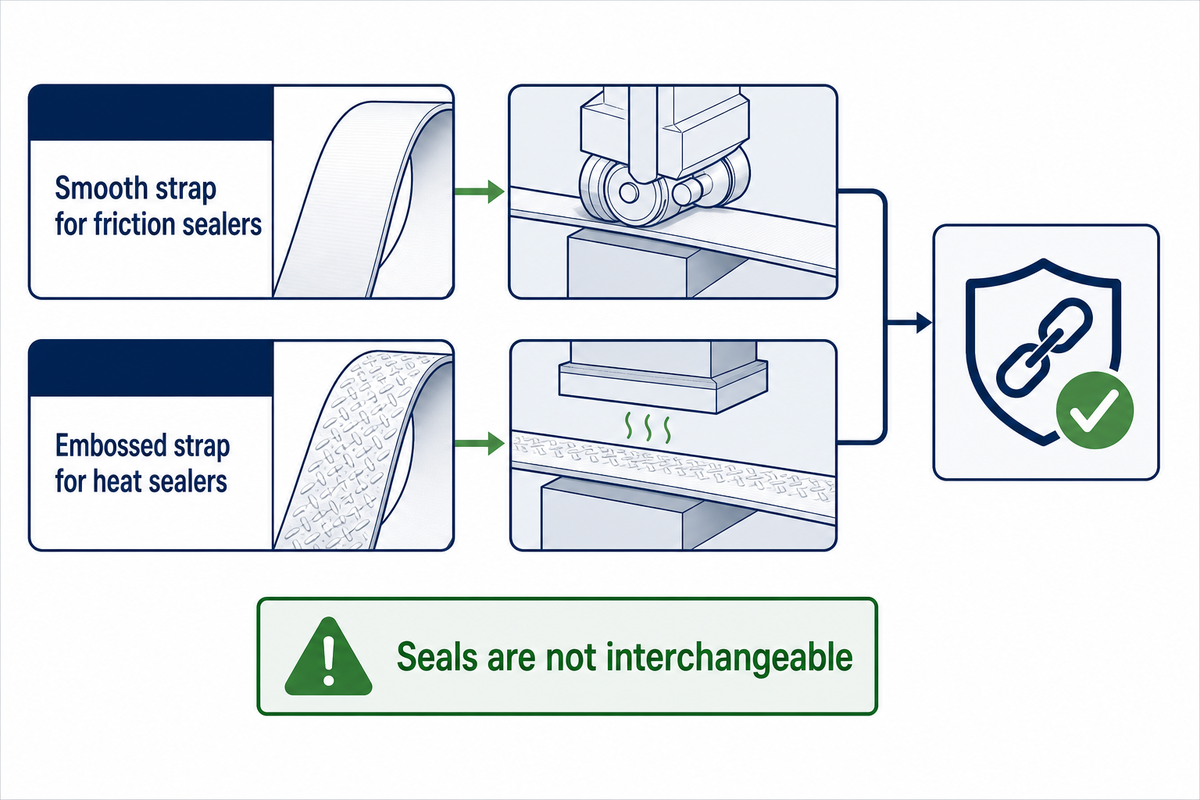
The face finish of the strapping is also critical. Smoother strapping for friction sealers, patterned/embossed strapping for heat sealers are typically the order. Specifying embossed for a friction-use tensioner, or vice-versa, is another frequent and fixable mistake on new packaging lines.
You need to get your strap, seal method and tool specifications right. Seals are not interchangeable between tool types, and pairing the wrong tools and seals is one of the most common setup mistakes on heavy-duty applications: a mismatched strapping tensioner and sealer combo used for securing heavy loads will jam mid-shift instead of helping improve productivity.
Strapping Tensioner Safety: What Actually Goes Wrong
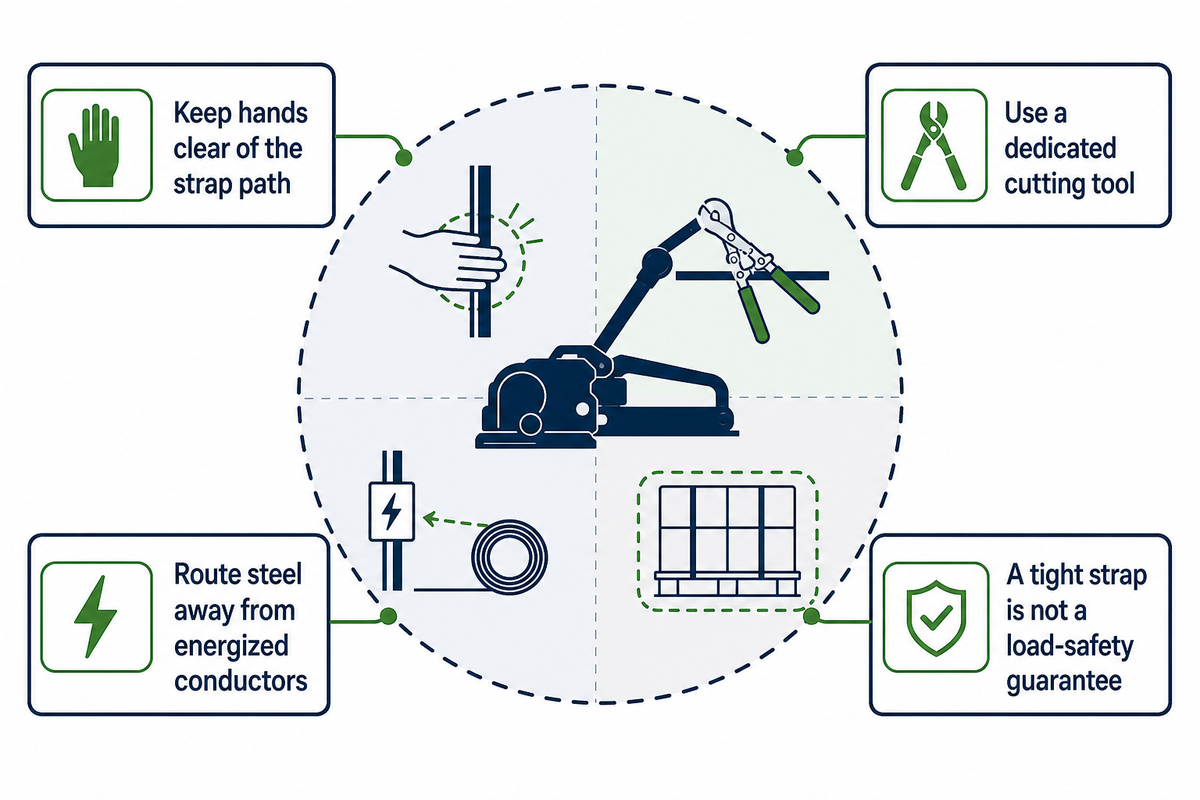
Three common edges frame typical strap tensioning injuries, general hand-tool dangers, edge-protector timing issues, and electrical contact with steel strapping, and a very precise habit, not simply the phrase ‘beware of edges,’ can prevent the latter two. Operators during packing and strapping activities can face trapping points, unexpected movement, cutters, loads dropped from racks, freed jams, stored energy, released tension and the strap end hand-trap, when hand and strap have entered the strap’s working space prior to it drawing tight.
- Never set or displace an edge protector while a battery-powered strapping tool can activate – switch off power or isolate the “enabling state” first: should it accidentally fire, the strapping tool will just immediately cinch.
- Keep hands clear of the path between the strap and the load once tension starts building — that gap is where the nip-point hazard above actually happens.
- Ensure that steel strapping is routed away from exposed energized conductors or circuit parts, or use suitable on-site electrical-safety devices on the conductors first, for any instance that requires conductive steel strap near live conductors. There are both electrical-contact, and physical risks.
- ✓ Cut strapping only with a dedicated cutting tool. In marine-terminal cargo work this is a direct OSHA requirement (29 CFR 1917.51(c)); outside that specific jurisdiction it’s still the industry-standard practice, because a strap under tension released by anything else (pliers, prying) can whip back.
“Only cutting tools shall be used to cut metal strapping or banding used to secure cargo.” — 29 CFR 1917.51(c), OSHA marine terminal cargo-handling standard
When NOT to trust a “held” load: wrapping and strapping can bind a stack together and secure it to a pallet, but that contribution alone doesn’t confirm a damaged pallet, an unsupported load arrangement, or how the unit will hold up in transit. A tensioner that “feels tight” is a packaging step, not a load-safety guarantee – treat a visibly damaged pallet or an obviously unbalanced stack as a stop-work condition regardless of how well the strap is tensioned.
Troubleshooting: Loose Straps, Slipping, and Tool Wear
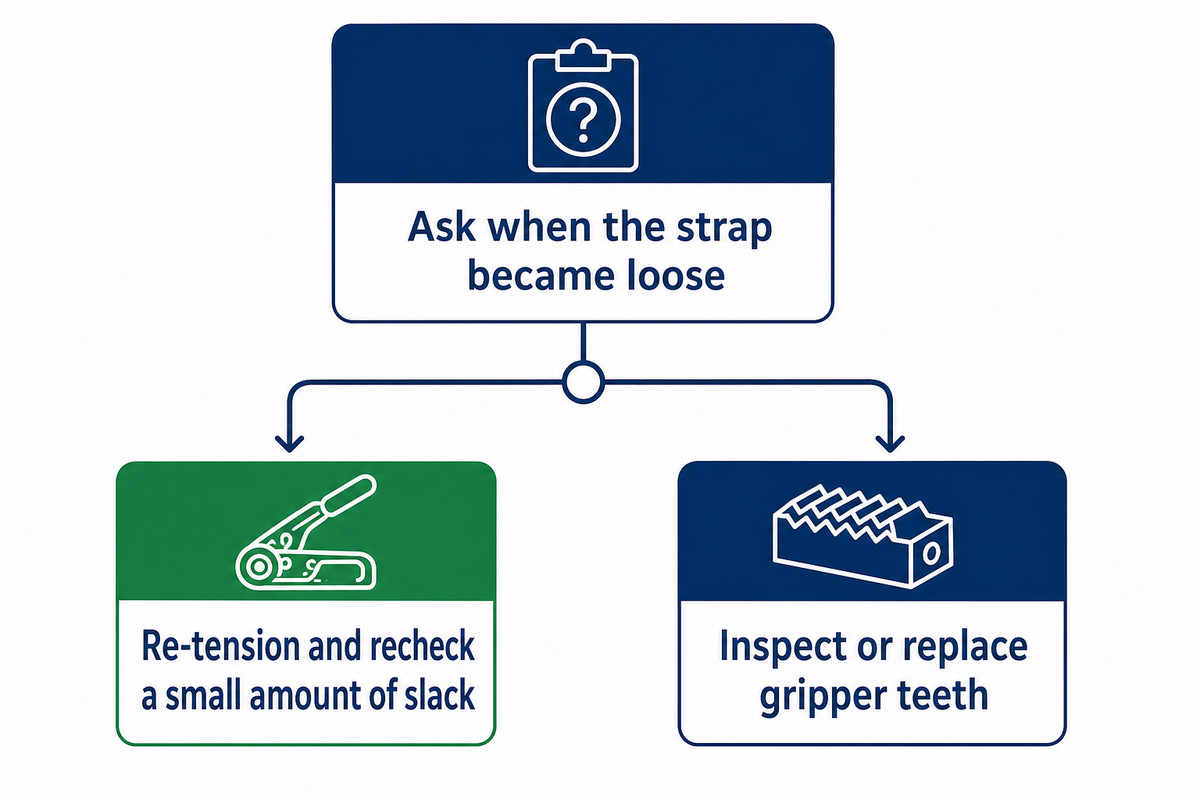
So the Loose-Strap Diagnosis Ladder begins by asking one question before you’ve even got the tool in your hands: how much time has passed since the strap was cinched tight and second, does it ever clamp effectively when you first tighten it. They represent distinct failure pathways. A small amount of slack often just needs the strap re-tensioned tightly and rechecked before transport and storage; if you need to reposition the load first, do that before re-strapping, since extra slack from a shift is easy to mistake for a tool problem. Following the checklist above will help ensure the strap achieves the desired hold and that the tensioner works well without over-tightening. A 2006 tensioner-tool patent filing (originally Illinois Tool Works, later assigned to Signode) frames this exact gripper-vs-feed-wheel tradeoff as a design limitation of gripper mechanisms under high tension, though as prior-art framing in a competing company’s own filing, it’s worth weighing alongside the wear-related causes above rather than as independent, disinterested testing.
| Symptom | Likely cause | Action |
|---|---|---|
| Strap found loose on re-inspection, days later | Storage time, cyclic humidity, material relaxation, or load compression/settlement — not a tensioner defect | Re-tension and log the interval; if it recurs quickly on the same load type, revisit strap material choice |
| Strap slips inside the tool while tensioning | Gripper-style tensioner not “energizing” into the strap under high tensile force, especially if gripper teeth wear unevenly | Inspect/replace gripper teeth; feed-wheel-style tensioners are reported to grip more consistently at high tension |
| Strap or seal fails shortly after full tension | Over-tensioning — tension that is too tight can damage the load or the strapping itself, not just under-tension | Back off to firm-but-even tension; treat “as tight as possible” as a myth, not a target |
| Powered tensioner completes its cycle but load still shifts | A completed feed/tension/seal/cut cycle confirms the tool worked — it does not by itself confirm downstream pallet-release or distribution performance | Re-inspect load stability separately from tool-cycle completion; they are not the same check |
Not suitable for: this ladder assumes a mechanically sound tensioner. Any tool with a bent frame, cracked gripper housing, or damaged windlass spindle needs repair or replacement, not re-tensioning.
Tensioner vs. Strapping Machine: Which Do You Need?
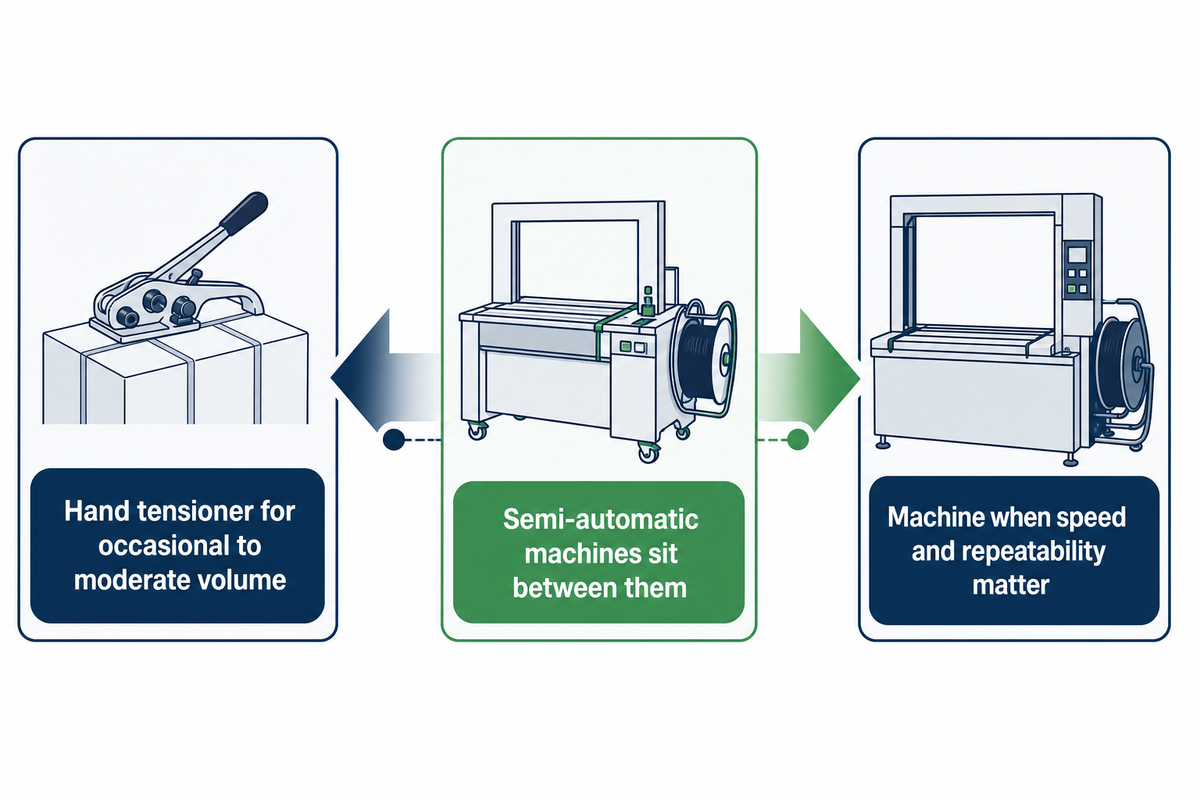
Stick with a hand tensioner while volume is occasional to moderate; move to a strapping machine once cycle speed and repeatability start to matter more than upfront cost. The gap isn’t strictly binary — semi-automatic tabletop machines sit between them, some triggered by a start switch, a photoeye, or a footbar, and Packaging Digest reports one such unit, the D2400 tabletop strapping machine, exceeding 50 cycles per minute.
If you’re evaluating a new, modified, or rebuilt machine (rather than a hand tool), note that ANSI/PMMI B155.1-2023 sets lifecycle hazard-identification and risk-assessment requirements for industrial packaging machinery — a compliance step a hand tensioner purchase does not trigger.
Pallets vs. Boxes: Does the Application Change the Technique?
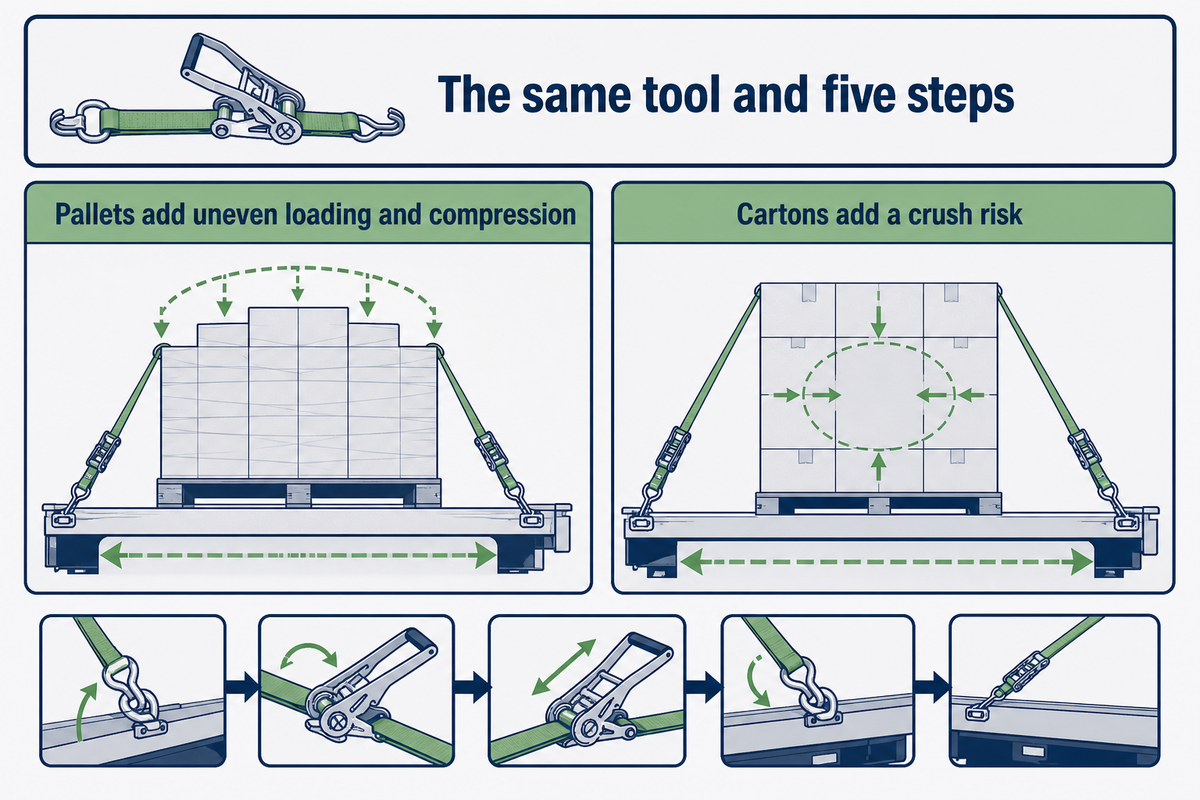
No matter whether you’re securing a pallet or a carton, the tool and the five steps you’ll walk through remain the same; what changes is the strap count, strapping position, and your tolerance for error. Pallet loads add uneven loading and ground-surface compression to that error budget, while cartons add a crush risk instead.
For pallets, uneven loading, pallet quality, and ground-surface compression can reduce how much tension actually reaches the load versus being absorbed by slippage within the stack — dynamics our pallet-strapping walkthrough covers in more depth, including load paths and edge protection. For cartons, the danger runs the other way: over-tensioning too-light packaging crushes the corner before the strap nears its tensile limit, so favor snug-over-maximum for lighter packaging.
2026 Outlook: Battery Tensioners Are Shifting From Niche to Mainstream
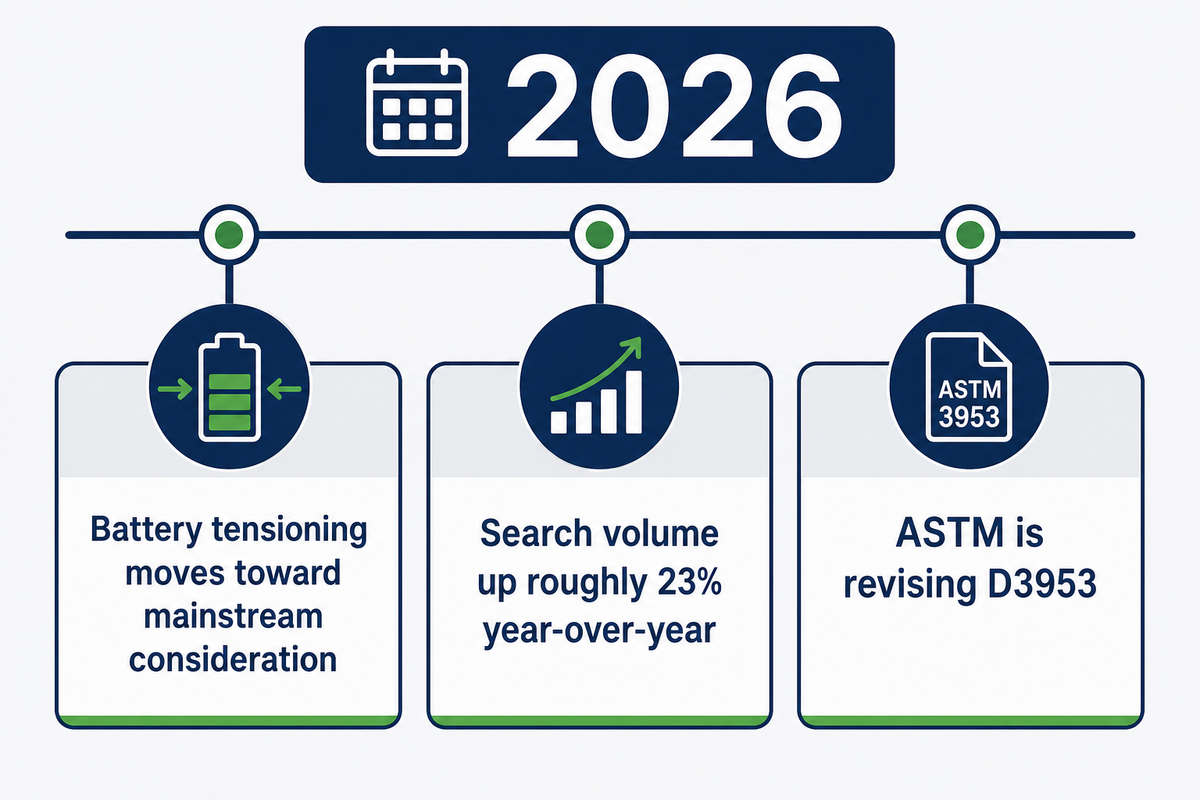
Search and market data both point the same direction: battery-powered tensioning is shifting from a niche upgrade to a mainstream consideration for high-volume operations, not a luxury add-on reserved for large-scale automation. Search volume for battery-strapping tools has risen roughly 23% year-over-year according to keyword search-volume trend data, and that lines up with real product activity, Signode’s BXT4 (up to 800 cycles per charge, ergonomic trigger design) and similar tools have been covered in trade press through 2026, and USPTO filings for wireless strap-tension monitoring sensors (transceiver-based systems that alert a remote monitor when tension drops) confirm it as a distinct technology category, from an earlier patent, US 10,328,840 (granted 2019, now lapsed for non-payment of maintenance fees), through the currently active US 11,993,199, granted 2024 and in force through 2041. Separately, ASTM is running an active revision of D3953 (steel strapping and seals), explicitly inviting industry participants to address closure-method changes since the standard’s last full review, worth watching if your procurement specs currently cite an older edition.
Market-size figures for the broader strapping-equipment category (several forecasts put it in the $5–6 billion range for 2025, growing at a mid-single-digit CAGR through the early 2030s) vary across research firms and should be read as directional market context rather than a precise, audited figure, if you’re budgeting for 2026, the more actionable takeaway is that ergonomic, battery, and semi-automatic options are proliferating at the mid-market price point, not just at the high end.
FAQ
Q: How do you tension a band with a banding tool?
Lock the free end of the strap in the tensioner’s gripper or feed-wheel, then crank a windlass or pump a ratchet lever until the strap is snug against the load.
Windlass tensioners wind the strap around a rotating drum using crank-arm mechanical advantage; ratchet tensioners use a toothed wheel a lever drives in the tightening direction, locking once you stop. Both depend on the free end staying clamped — if the gripper doesn’t bite evenly, the strap slips instead of winding in, which is covered in the troubleshooting table above.
Q: How to tension steel strapping?
Steel strapping follows the same wrap-load-tension-seal-cut sequence as poly strapping, but builds tension faster per crank stroke because steel has almost no stretch, and it pairs with a separate crimp-seal tool rather than a combined sealer on most manual setups.
Steel has minimal to no give, so very little turning of the device translates into a large amount of strap tension compared to poly. With a full, tightening pull you’ll see the strap become taut when using a lever-tool, well before you’ve reached the limits of handle movement. Always use a cutting tool dedicated for steel straps – any other method can lead to a snap-back hazard for you and surrounding personnel if the strap is being cut under load or by means of prying.
Q: Are there safety precautions I should follow when using a battery strapping tool?
Yes, the main one is never positioning your hands or an edge protector where the tool could activate and draw the strap tight unexpectedly; isolate the trigger or battery before adjusting anything near the strap path.
While battery tensioners negate this manual effort, they also introduce a new potential for mistiming activation. Battery tools can fire the second you hit the button; a stray finger or a guard might snag in the path of a moving strap and get pinched instantly. Besides that, normal hand-tool hazards, including pinch points, blades, and stored energy in a tense strap remain as with any hand tool.
Q: How often should I maintain a manual strapping tensioner?
Inspect the gripper teeth or feed-wheel for wear whenever you notice slipping under tension, since worn gripping surfaces are the most common cause of a tensioner that suddenly “won’t hold” a load it used to hold fine.
While some tensioner manufacturers do cite a suggested interval for replacement, there’s no generally accepted, fixed number of cycles for hand tools. The actual signal that maintenance is needed – instead of a calendar day – is when you experience slippage under tension where it previously did not occur.
Q: Can one tensioner handle both light and heavy-duty jobs?
Not reliably, a tensioner sized and geared for light carton work will struggle with heavy-duty steel strapping, and an oversized industrial tensioner can over-tension and crush a light carton before you notice, so match the tool to your typical job, not your occasional edge case.
Even if your operation genuinely covers everything from small cartons to heavy pallets, the most practical setup at both extremes is to invest in two separate tools: a light carton-duty tensioner won’t offer effective tension and gripping for heavy pallet strapping, and a heavy-duty tensioner won’t have the range for small cartons or narrower strap widths.
Q: What is the difference between strapping and banding?
“Strapping” and “banding” are largely used interchangeably in the packaging industry to describe the same process of tensioning a plastic or steel strap around a load; regional and vendor terminology varies more than the underlying technique does.
You will see both terms used for the same tools and steps covered in this guide. Where the terminology does diverge more meaningfully is in adjacent processes — for example, “cable tie” or “poly-lashing” tools solve a related but distinct problem from strap tensioning.
Ready to Order a Strapping Tensioner?
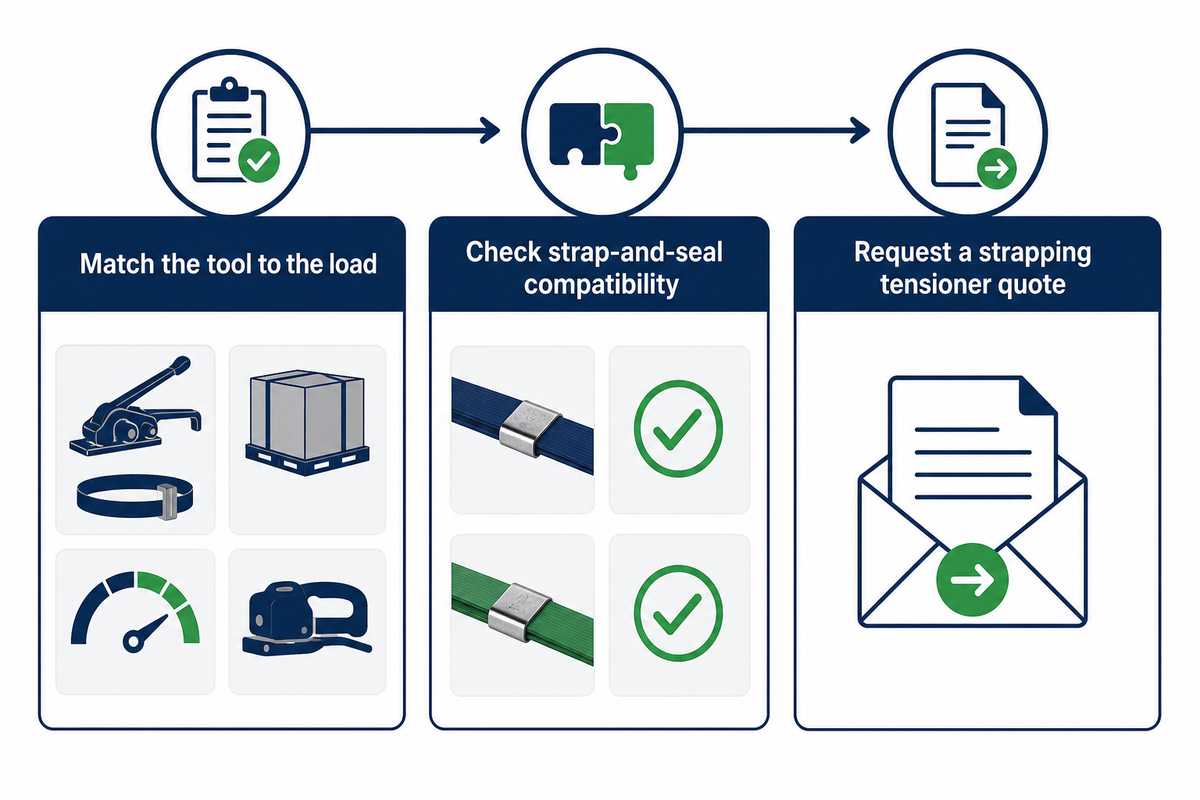
Armed with knowledge about your strap type, your common volumes, and which of the battery and pneumatic systems fall under your Power-Upgrade Threshold, you simply need to match this to an appropriate tool and be certain of strap-and-seal compatibility before you order.
Get a Strapping Tensioner Quote →
Why We Write This
Because UD Packaging produces PET strapping and carries the strapping tools as well as the seals, the same operating and repair questions relating to tensioners come up regardless of industry (industrial, carton or palletizing): “why is my strap slackening on this load?”, “when should I upgrade from a hand tensioning system to power operation”, or “how tight can this strap safely be tensioned?” We refer to industry standards, safety guidelines, and operational procedures to guide customers through the answers.
References & Sources
- 29 CFR 1917.51(c) — Hand Tools U.S. Occupational Safety and Health Administration
- ASTM D3950-23, Standard Specification for Strapping, Nonmetallic ANSI Webstore / ASTM International
- Interested Parties Invited to Join in Revision of ASTM Steel Strapping Standard (D3953) ASTM International
- ASTM D3953-15(2022), Standard Specification for Strapping, Flat Steel and Seals ANSI Webstore / ASTM International
- US 2007/0169833 A1, Manual Tensioner for Metallic Straps Illinois Tool Works (original applicant), later assigned to Signode / USPTO Google Patents
- US 10,328,840 B2, Cargo Strap Tensioning and Monitoring System USPTO / Google Patents
- US 11,993,199 B2, Wireless Transmitting Strap Tension Monitoring Device USPTO / Google Patents
- Nasarwanji et al. (2016), comparative study of bulk-container sealing methods (muscle activity and task duration) NIOSH-affiliated / PubMed record PMID 27226675
- Hand-Arm Vibration at Work, Employer Responsibilities UK Health and Safety Executive
- ANSI/PMMI B155.1-2023, Safety Requirements for Packaging and Processing Machinery ANSI Webstore / PMMI
- PP Strapping vs. PET Strapping, tension-retention comparison Alliance Packaging Group (vendor technical blog)
- D2400 Strapping Machine, cycle-rate and trigger-mode coverage Packaging Digest
Related Articles
- Strapping Machine Types, Safety, and Buying Guide when to move from a hand tensioner to a full machine
- Strapping Tools: A Complete Guide to Tensioners, Sealers, and Machines the full tool category this guide sits inside
- Plastic Strapping Types: PP vs PET Buyer’s Guide deeper material selection detail
- How to Strap a Pallet Safely: Step-by-Step Guide pallet-specific load-path and edge-protection detail
- Strapping Seals for PET & Poly Strap matching seals to your tensioner and strap grade