Get in touch with UD Packaging Company

Updated September 2026
PET Packing Strap Troubleshooting is the process of tracing a fault to the first failed step while preserving evidence across 7 possible nodes: measurement, strap roll, feed path, tension transfer, joint/tool, load interface, and route. Don’t adjust anything until you’ve a known good baseline.
Quick answer
A PET packing strap problem is a fault, not a conclusion. Record where the cycle first changed, compare a known-good condition, and use one controlled change only as a screen. If measurement reliability or interacting factors remain uncertain, keep the root cause open.
If you stumbled here because strap won’t feed, if a friction weld keeps opening, if there’s a variation in tension from cycle to cycle or if a pallet arrived loose, this guide is for such situations. This guide isn’t a replacement for the product page or a page for every machine wherein every machine has one and only one correct setting. For definitions and materials, refer to the pet strapping guide, the other guide is more generic, this guide focuses on failure isolation.
As an evidence route for PET plastic strap, this strapping machine troubleshooting guide isn’t a general repair guide. Polyester strapping problems occur during tensioning, joining or handling, but a loose strap can begin in the measurement method, load build or route. Good operator training eliminates random changes and downtime. Only trained maintenance should replace worn components according to the approved procedure; operators shouldn’t enter guarded areas to pursue a fault.
1. Start at the First Failure Point
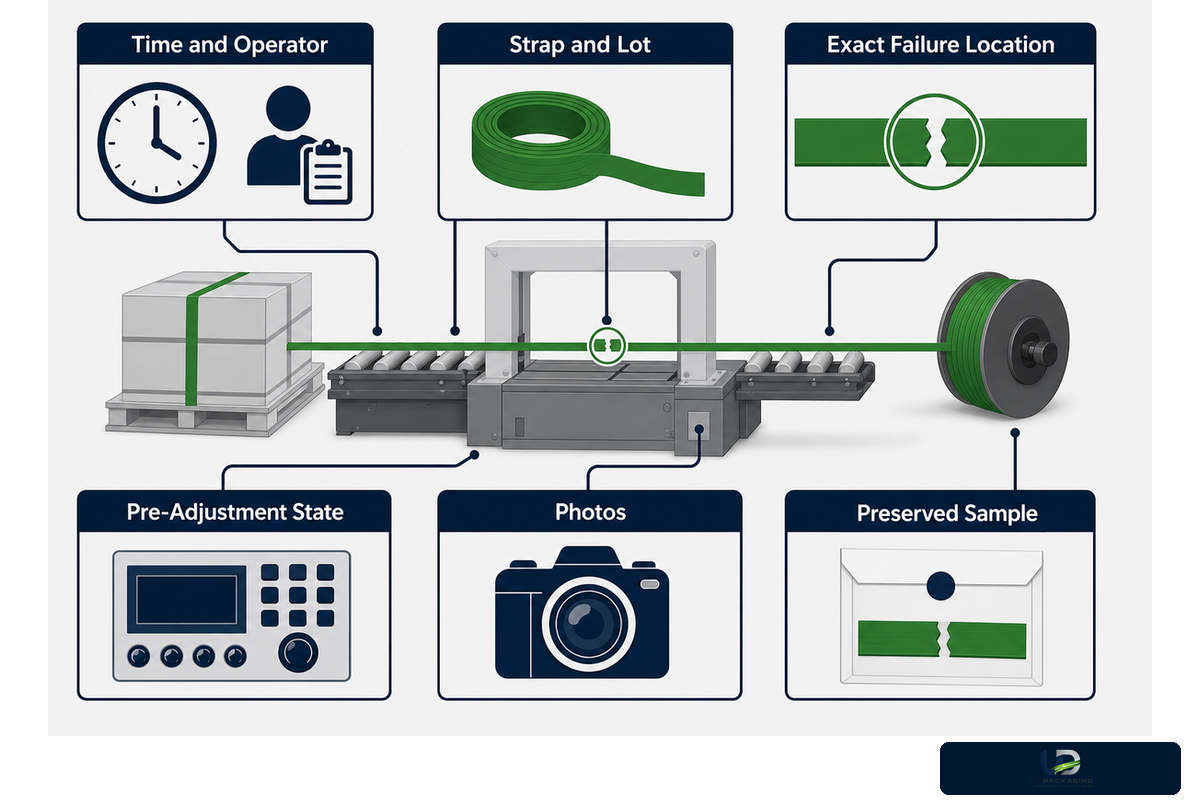
The best time to learn from a PET packing strap failure is before anyone has cleared the jam, dial adjustment, cut away a failed loop, or rolled replacement. Note the first change you can see and keep track of what happened in the event of later faults. The first change is often the best indication of the evidence route.
Describe the event without citing the cause. “Strap folded when it hit the arch entrance” is observation. “Bad strap” is a conclusion. “Joint opened during the first forklift turn” is also an observation. “Not enough tension” is still a hypothesis. Distinguishing the difference prevents the team from adjusting multiple variables around a conjecture.
Capture now
- Time, operator, machine or tool identity
- Strap label, dimensions, core and lot
- Exact jam, slip, break or joint location
- Control-panel state before adjustment
- Photos of roll, path, joint and load
- An intact failed sample when safe
Do not erase
- The original break origin
- The failed weld surface
- The first point of feed deviation
- The load condition at failure
- Which variable changed before onset
- Whether the issue follows one lot
Safety is of the utmost importance, and should never come after evidence. If you must enter a closed area to remove material that’s near a moving or energized part, or if you must perform maintenance on the equipment, stop what you’re doing and follow the approved energy control procedure specific to the equipment. OSHA says it’s possible for there to be unexpected startup or the release of stored energy, and for this to injure you severely. HSE also says the same about maintaining equipment. Unfortunately, this article isn’t able to help you determine which procedure is applicable to the equipment and the task you’re performing.
2. Capture a Repeatable Baseline Before Adjustment
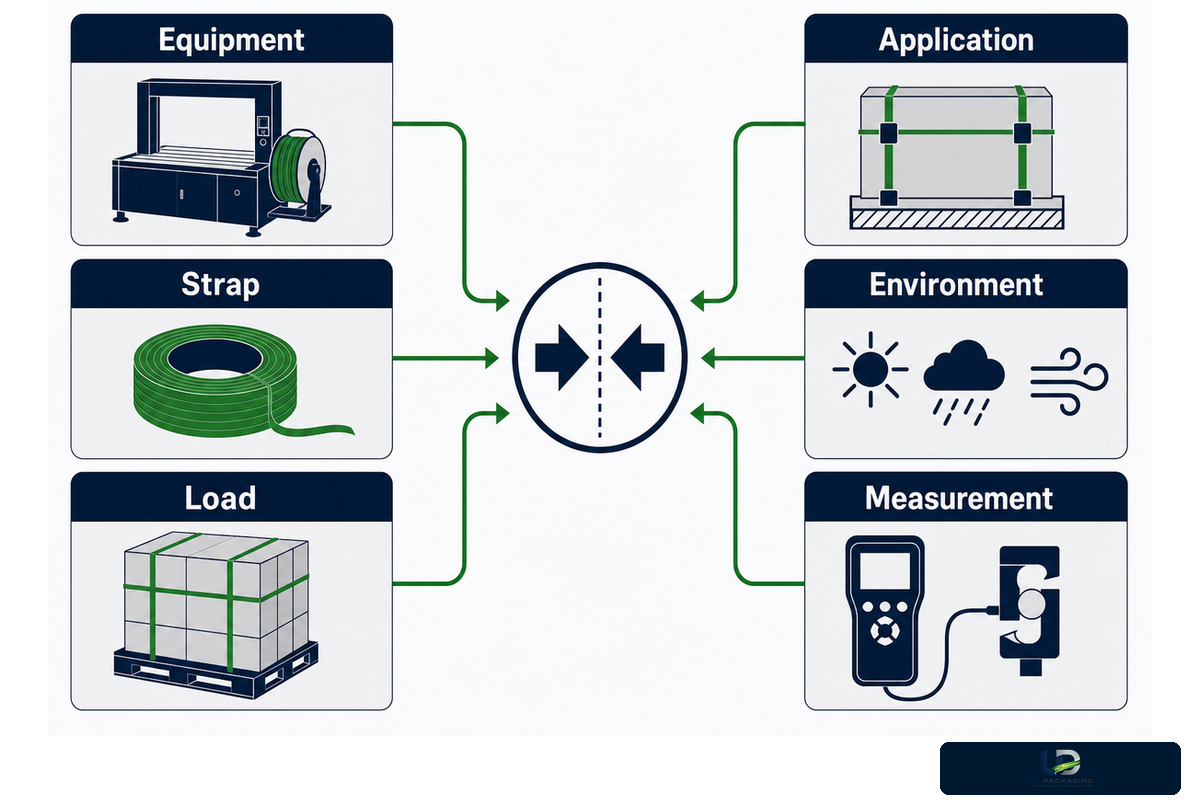
Establishing a baseline makes measurements that come after it comparable. It doesn’t prove that the measurements are correct, but it prevents uncorrected drifts in the machine, material, load, operator, and environment. Place the baseline next to the machine. Only change the baseline when the approved process has been changed.
| Baseline field | What to record | Why it matters |
|---|---|---|
| Equipment | Model, serial, tool, software/recipe if relevant | Settings and compatible strap ranges are model-specific |
| Strap | PET grade, width, thickness, finish, core, supplier, lot | Prevents an undocumented substitution from hiding |
| Load | Weight, footprint, stack pattern, compressibility, edges, pallet | The same strap can behave differently on another load family |
| Application | Strap position, number of bands, corner protection, operator method | Geometry changes restraint and local stress |
| Environment | Storage time, temperature/humidity condition, staging and route | Package materials and test comparability can change with condition |
| Measurement | Method, instrument, status, operator, units and resolution | A noisy or biased method can manufacture a false difference |
| Timing | Cycle count, timestamp, fault onset, and restart or reload effect | Separates a setup error from drift that develops during operation |
| Control | Known-good roll, package, tool condition, and permitted variation | Shows whether the fault follows material, equipment, or the load |
Measurement isn’t a completely neutral witness. NIST breaks measurement-process problems into repeatability, reproducibility, stability, calibration, and uncertainty. If one of the operators, gauges, fixtures or geometries yields a different result, the “difference” may be more attributable to the measurement system, than to the strap. Ensure the method is appropriate before using the result to assign accountability.
Boundaries are also needed for conditioning. ASTM D4332-22 preconditions containers, packages, or components of packaging prior to testing. It does not give a single universal condition for your plant. Rather, the lesson is more straightforward here: record the environmental condition, and do not compare packages conditioned in different ways as if they were identical.
3. Use the 7-Node Failure Isolation Map
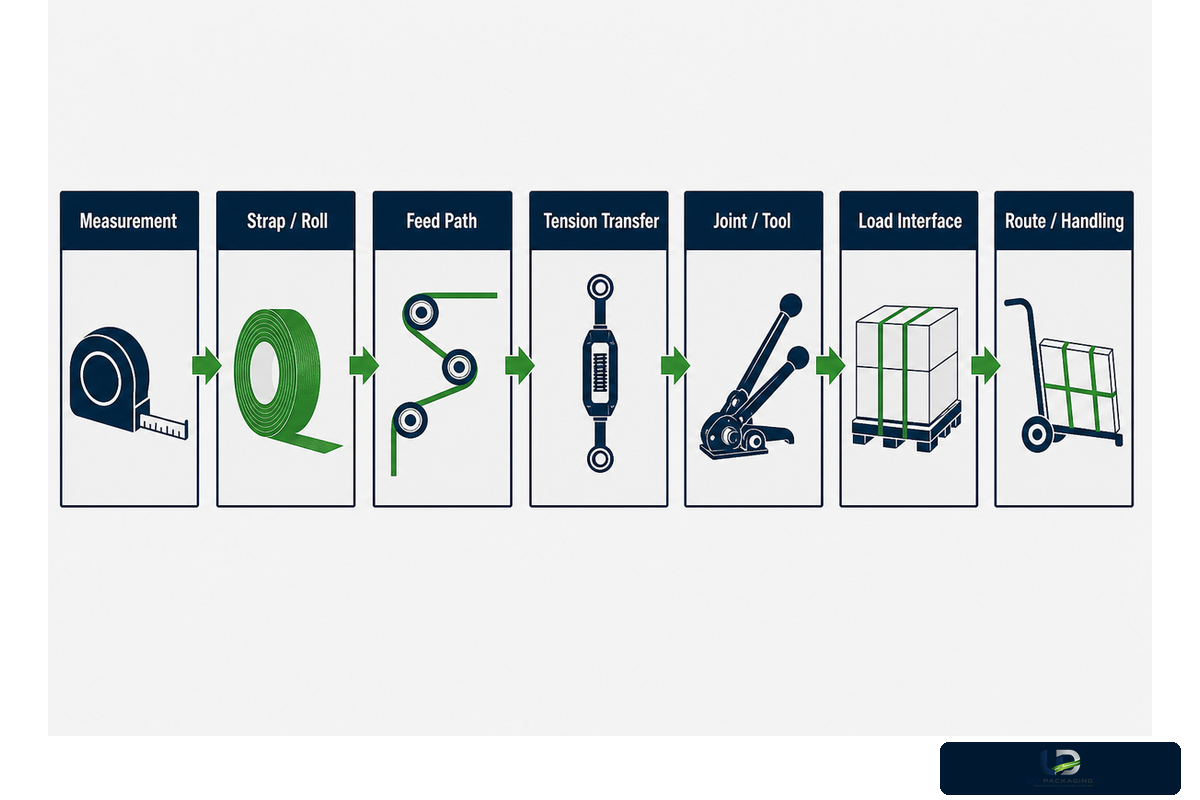
The map is a trip-and-cue tool, not a conclusion machine. Measure, then assess roll, feed path, tension transference, joint/tool, load interface, and route. The order is important. It prevents a clear fault from becoming an automatic material complaint and presents the evidence that would challenge each of the preliminary assumptions.
| Node | First check | Competing cause | Evidence to keep | Likely owner |
|---|---|---|---|---|
| 1. Measurement | Method, instrument, repeat operator/setup | Gauge bias, resolution, fixture or technique | Raw readings and method ID | QA |
| 2. Strap/roll | Label, lot, dimensions, winding, edge | Wrong core/orientation or storage damage | Roll photo, sample, packaging | QA/procurement |
| 3. Feed path | First deviation, guides, rollers, debris | Drag, damage, alignment or obstruction | Marked jam point and control-roll result | Operator/maintenance |
| 4. Tension transfer | Cycle consistency and strap contact | Slip, wear, method, load compression | Settings plus observed outcome | Operator/QA |
| 5. Joint/tool | Compatibility, joint face, alignment, wear | Contamination, process or cooling | Good and failed joints | QA/maintenance |
| 6. Load interface | Corners, stack, pallet, strap position | Settlement, edge cutting or poor geometry | Before/after load photos | Packaging/operations |
| 7. Route/handling | When the condition first changes | Impact, vibration, compression, forklift event | Checkpoint and route evidence | Logistics/plant manager |
Use the map both ways. If the same guide point is failed by a known good roll that’s compatible, the material hypothesis becomes weaker. If one lot fails and the control passes on the same machine, load, method, measurement system and condition, then the lot/material branch becomes stronger, but it still requires unconsumed samples and a review by the supplier. “strap” vs “machine” is typically not decided by a single observation.
Give each of the elements a boundary. Stop the measurement branch once the method is repeated sufficiently to make the decision, and its status is known. Stop the roll branch once the identity, dimensions, winding and condition are identical to the approved baseline. Stop the machine branch prior to any unapproved access or repair. Stop the material conclusion once the load, environmental condition or route changed concurrently. A checklist without stop rules will continue to expand and include all potential causes. This is neither an efficient nor an effective way to select the next step.
Separate evidence strength from operational urgency. An example is a case as shown in the following line. Safety of the load means the line must stop operating even if the root cause of the issue hasn’t been determined. One clean cycle may provide evidence for continued observation, but it isn’t sufficient evidence that the issue has been resolved. Record the containment decision, the investigation decision, and the final conclusion as three separate instances. This makes the subsequent instances which one has to hand over much easier.
4. When PET Packing Strap Will Not Feed or Track
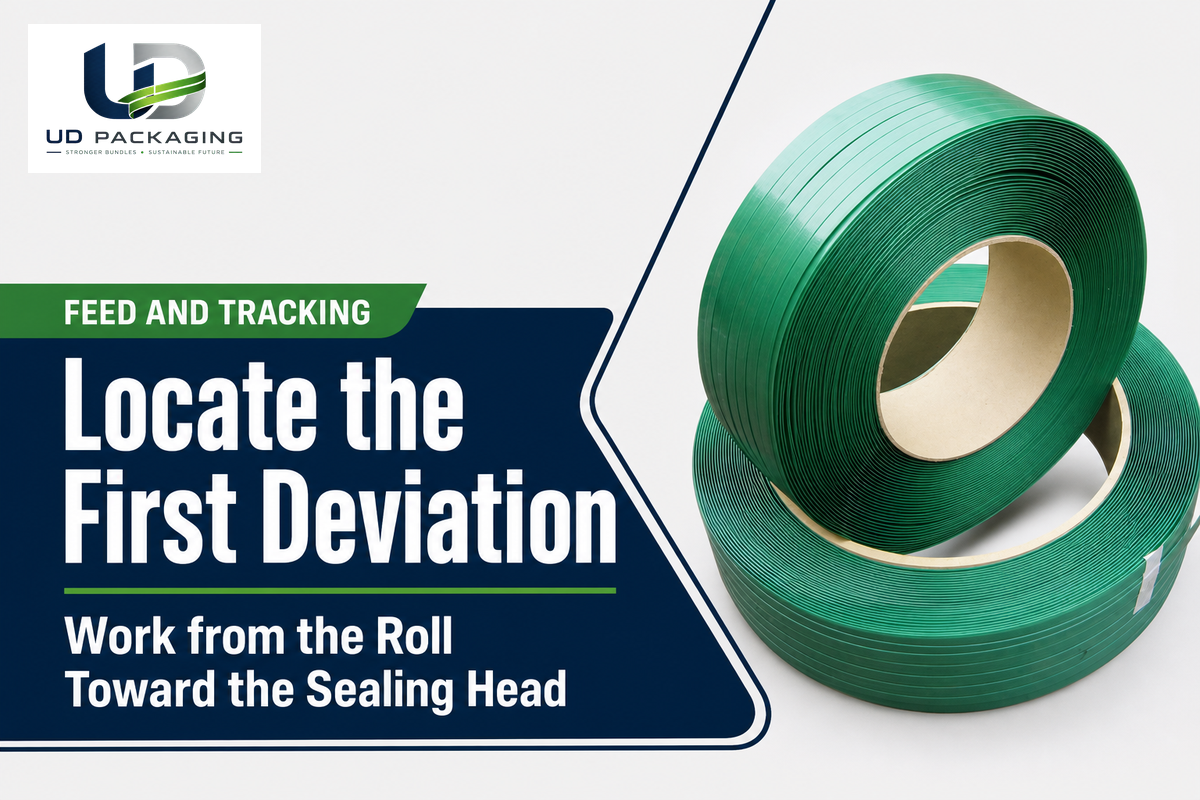
A feed problem begins when the strap stops following the path, not when the jam is noticed. Work from the roll towards the sealing head and note the first fold, twist, buckle, slip or edge contact. Only clear what the approved machine procedure permits.
- Verify identity and orientation — confirm PET, dimensions, core, winding direction, and compatibility with the specific machine.
- Inspect the roll — look for collapse, telescoping, damaged edges, moisture exposure, or a deformed leading end.
- Trace the path — inspect dispenser drag, guides, rollers, arch or under-pallet channel, and the exact first deviation.
- Check interference — find strap dust, fragments, loose film, pallet damage, or packaging that enters the path.
- Compare safely — after returning to an approved baseline, run a compatible known-good roll on the same load family.
When both rolls fail at an identical location, stop considering this a supplier comparison problem. The path, guide, roller, dispenser, sensor, cutter tail, pallet opening and load geometry require examination. If only the suspect lot fails within stable boundaries, retain both rolls and compare width, thickness, edge, stiffness, winding and condition with a suitable measuring technique.
Don’t transform this checklist into internal repair instructions. In packaging operations, practical fixes should mean approved internal repair instructions: a checklist for a misaligned guide or other mechanical failure must stop where guarded-area or energy-control procedures apply. Model limits, access points, jam clear functions, heated elements, and safe reset sequences differ. Model limits, access points, and safe reset sequences also differ when stretch film, edge protection, carton sealing, protective packaging, or polypropylene strapping enters the path; polypropylene isn’t interchangeable with PET. A general strapping machine guide can describe machine categories; the OEM manual and your trained maintenance team determine the course of action. The OEM manual and trained maintenance team should use the strapping machine guide to check strap width, strap ends, strap feeding, and strap quality before calling common problems on a packaging line a material fault.
5. When Tension Is Too Low, Too High, or Inconsistent
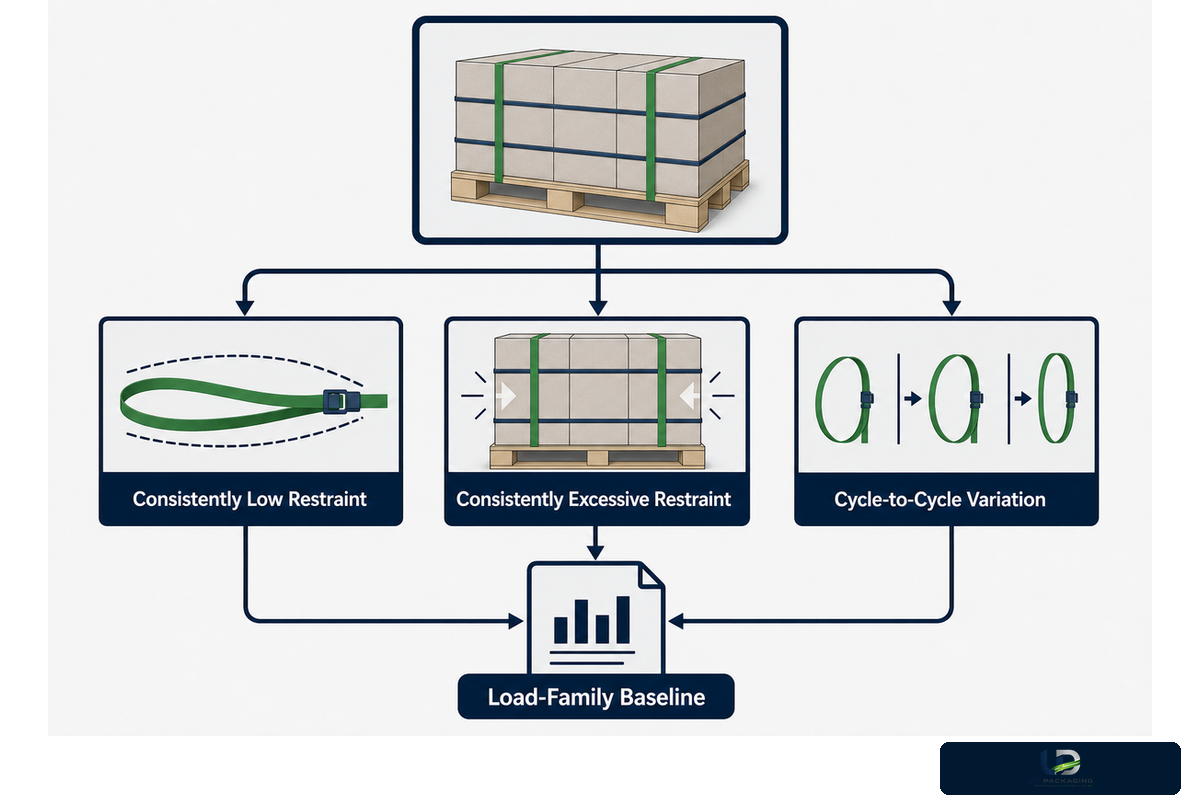
Tension faults can originate before, during or after the tool pulls the strap. A displayed setting is an input, not evidence of a force on the package, and a tight loop isn’t evidence of maintained restraint. Record repeated cycles and note the condition change.
Start by separating three faults:
- Consistently low restraint: every cycle on the same load feels or measures below the approved baseline.
- Consistently excessive restraint: cartons crush, corners deform, trays crack, or strap bites into the package.
- Cycle-to-cycle variation: the same documented setup alternates between acceptable and loose, damaged, or slipped outcomes.
To troubleshoot consistent high or low results, look for problems with strap compatibility, hard/smooth contact surfaces, load compressibility, position of strap, the operator technique, and the maker’s stated range. For variability, look at repeatability: feed wheel/gripper condition, strap slip, change of contact geometry, overlap that isn’t consistent, state of the sensor, operator sequence and measuring method. If the load changes during subsequent cycles, there’s no longer a comparison of tension only.
Relating to tensioning evidence, capture the tensioning mode/setting along with the observed tool cycle and/or the resulting joint and post-treatment of the tool. A second tensioning is needed only if the strap, overlap, load and method are the same. This is more helpful to QA than a photograph of a dial, and may distinguish between stable tensioning and measuring or load-interface problems.
Don’t try to “fix” a loose shipment by adjusting the tension to an arbitrary level that appears to be better. Excess tension places too much load on the joint and may damage the load and still leave the root cause unaddressed. Likewise, a setting that’s low and safe for the cartons isn’t necessarily satisfactory if the stack settles. The correct decision is related to the load family and route and not to a single universal PET value. See the strapping tensioner guide for tool categories and the strapping tools guide for more tooling context.
When operators say “the tension changed,” ask which of the following changed: the displayed setting, the pull sound, the pull duration, the measured force, strap elongation, the changes in the carton, the joint condition, or the change after waiting. These can’t be exchanged for each other. Calling the change you observed helps maintenance identify a control value as QA describes the outcome of the package. Also, it tells when a tool remains the same and the load interface is inconsistent.
Use one load-family baseline instead of one plant-wide recipe. Use that load-family baseline instead of a plant-wide recipe to compare consistent strap tension, strap tension outcomes, tension adjustment, heavy loads, each specific application, load security, load stability, damaged goods, the weakest point, and industrial packaging conditions. Strap labels can be the same for a bundle made of compressible cartons, a sharp-edged product and a rigid bundle. Considering the aforementioned, the approved baseline should carry the load identity and the position of strap. If a load family can’t be stabilized, consider the result as the development of an application rather than troubleshooting a machine.
6. When the Seal or Friction Weld Is Weak
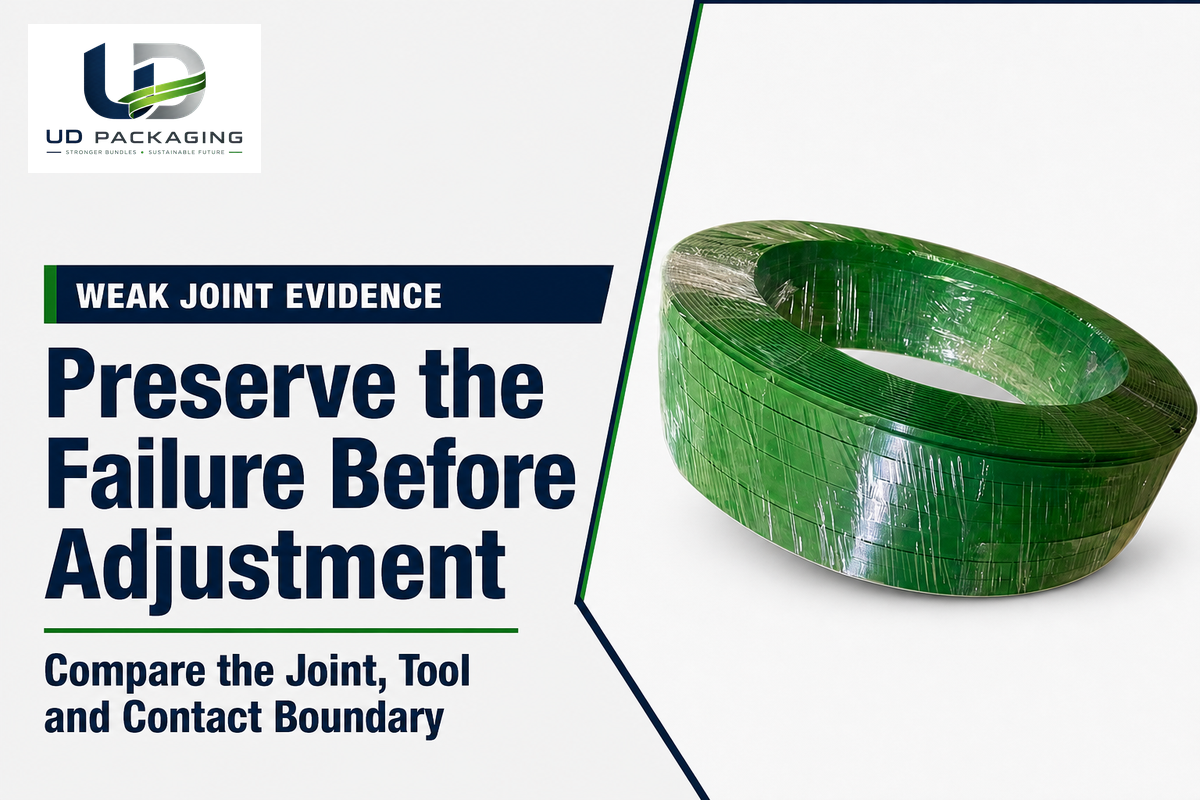
Before changing weld and tension settings, make sure to keep a weak joint. Joint opening can be caused by incompatible strap or joining method, contamination, poor overlap, misalignment, insufficient or excessive process input, insufficient cooling, worn contact parts, and tension that loads the joint outside of the acceptable process window.
Place a good joint made under the approved baseline next to the failed joint. Record the failure location. Did the joint fail internally? Did a strap fail? Did the overlap shift or did the strap fail in another location? Appearance is a qualitative strength test, but it also helps focus the next controlled check and prevent grouping failures as bad welds.
Check within the approved process
- Strap and joint-method compatibility
- Width, thickness and overlap position
- Clean, dry contact surfaces
- Alignment and visible wear condition
- Documented weld/seal and cooling state
- Repeat joint samples and preserved failures
Do not assume
- More tension strengthens the joint
- One good-looking weld proves consistency
- One temperature or time fits every tool
- A failed joint always means bad strap
- A passed joint proves route stability
- Visual inspection replaces required testing
ASTM D3950-23 defines nonmetallic strapping and joining methods for closing, reinforcing, bundling, unitizing, and palletizing, as well as relevant properties and joints. It enables teams to accurately discuss strap and joint evidence. This is not a troubleshooting guide for your equipment. This troubleshooting guide leaves equipment maintenance to the approved procedure: weak seals, strapping breakage, a malfunction, electrical faults, an overheat warning, moving parts, steps to lubricate or inspect wear parts, preventive maintenance, preventative maintenance, and strapping machine maintenance require a maintenance plan that defines correct operation, service life, consumable replacement, and replacement costs. For more details on this type of evidence framework, refer to the strapping joint strength guide.
7. When the Strap Breaks, Splits, or Frays
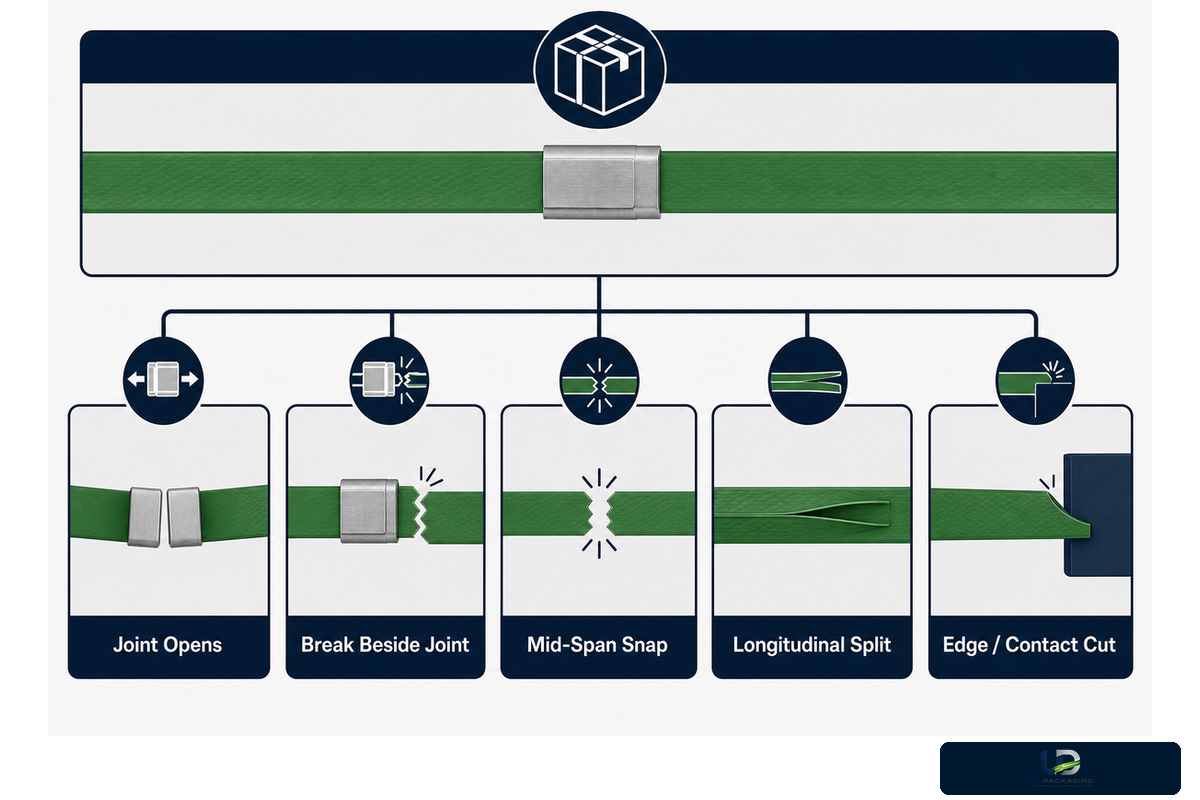
“The strap broke” conceals the most critical information: how and where it failed. Keep the broken loop in its current position and note its orientation on the load before discussing the strength of the break. Multiple contacts can overcome a stronger strap, as long as the primary failure mechanism is left in place.
| Failure origin | First questions | Evidence that changes direction |
|---|---|---|
| Joint opens | Compatibility, overlap, contamination, process, cooling, wear? | Same failure across lots at one tool condition |
| Break beside joint | Local heat/stress, alignment, notch or excess process input? | Failure moves when joint/tool condition changes |
| Mid-span snap | Damage, overload, impact, prior crease or lot condition? | Distinct origin visible on preserved sample |
| Longitudinal split | Edge damage, guide contact, winding or sample condition? | Split repeats from the same path/contact point |
| Edge/contact cut | Sharp corner, abrasive surface, damaged guide or missing protector? | Different lots fail at identical geometry |
Only after the evidence presented leads to some degree of compatibility, lot, dimensions, finish, or required performance, should a specification review be considered. Evaluating PET versus PP strapping or PET versus steel strapping is appropriate when the family of materials is a consideration. Neither comparison will repair a damaged guide or eliminate a sharp edge load.
8. When the Load Leaves Tight but Arrives Loose
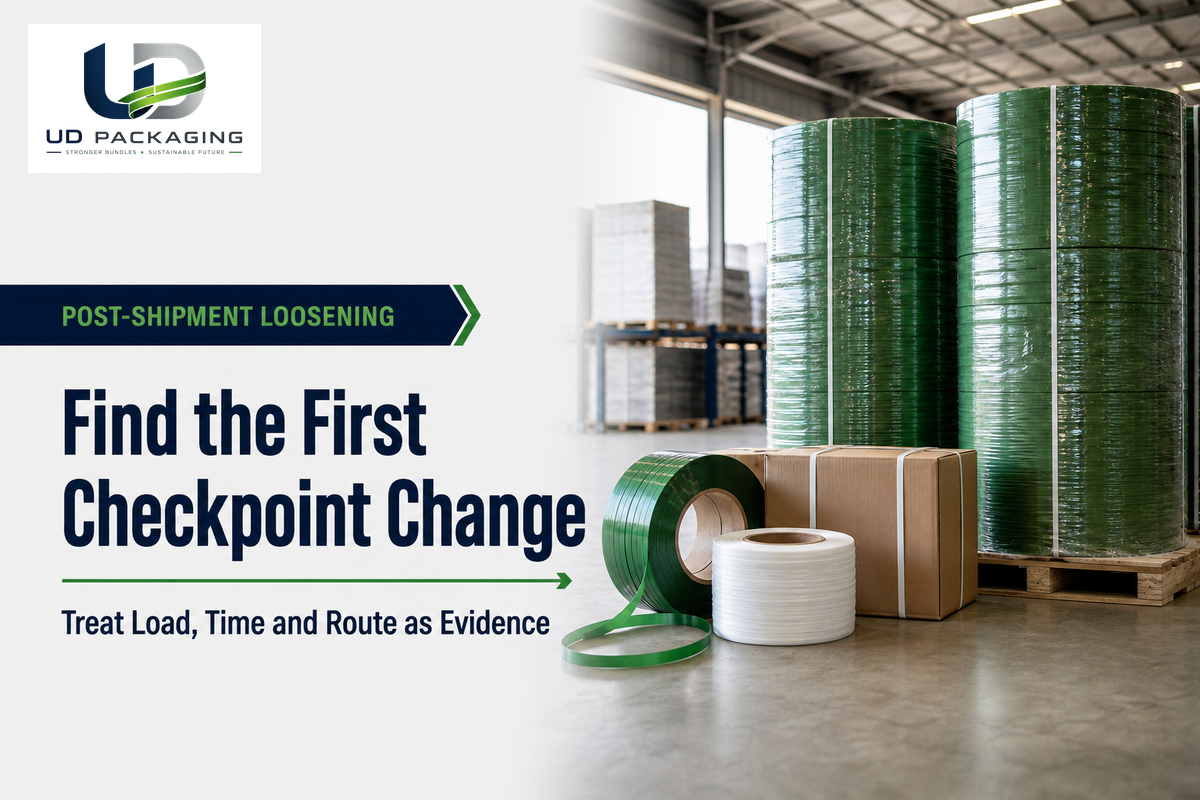
A package passing through a strapping machine may still experience changes during staging, forklift movement, trailer loading, exposure to vibration, impact, compression, and exposure to temperature and humidity. The loss of fit that occurs post-shipment is a time and route related issue. Determine when a restraint changed rather than treating the destination photo as the cause.
Create a simple evidence timeline: immediately after application, after the normal staging intervals, after internal handling, at dispatch, and after a representative transport or test. At each checkpoint, note strap position and the condition of the joint, the height and geometry of the load, contact with a corner or edge, visible carton compression, and the condition of pallet, as well as any handling event. Use the same vantage point and reference marks so movement is clear.
Common competing explanations include:
- The load settles or corrugated packaging compresses while the strap length remains nearly unchanged.
- The strap slides to a smaller package perimeter or off an edge protector.
- The joint slips or a local damage point grows under handling.
- The pallet or stack geometry changes, creating slack on one face.
- Impact or vibration changes the load independently of the initial machine cycle.
- Differently conditioned packages are compared as if their starting states were identical.
ISTA classifies screening tests from general and enhanced simulations pertaining to distribution conditions and their intended outcomes. Test selection is a packaging-engineering decision, and a vague “vibration passed” comment can’t justify that decision. A packaging paper hosted by RIT considers packaging, palletization, restraints, and movements in the distribution process as a system. Use a representative route or adequate procedure rather than promoting one station-side inspection into a route guarantee.
Counterfactual check
A known-good package that stays stable on Route A but loosens on Route B points more strongly to route/load interaction. A change limited to the suspect lot under the same controlled route and package boundary is a reason to preserve both samples for material review.
9. Run a Controlled Screening Trial and Escalate with Evidence
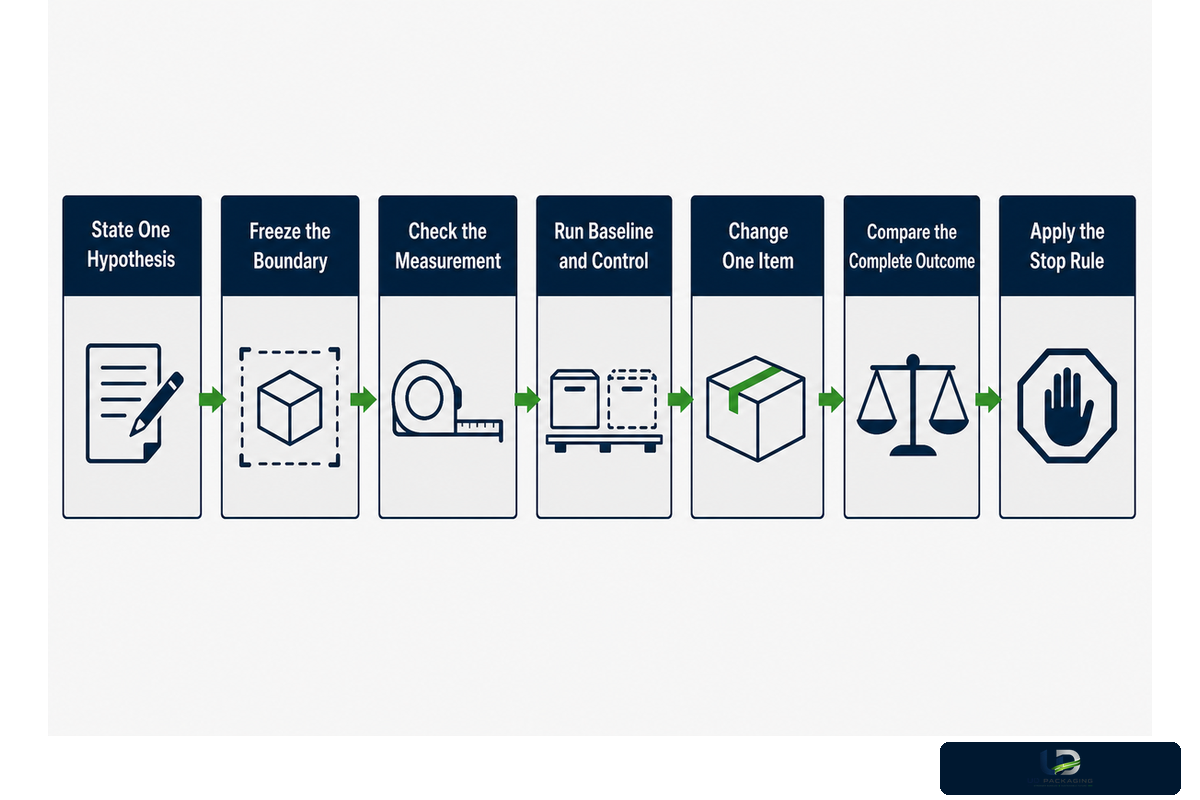
A single-factor test is only a preliminary screening. NIST warns that one-factor-at-a-time work does not reveal interactions. An incorrect result may still be obtained due to the interactions of strap, setting, load compliance, environment, joint formation, handling, and the measuring method.
“OFAT experimentation leaves us in the dark about factor interactions.”
One-Change Screening Trial Card
- State one hypothesis — for example, “the failure follows this roll/lot,” not “the strap is bad.”
- Freeze the boundary — same approved machine, load family, strap position, operator method, environment, and baseline settings.
- Check the measurement — record method, instrument status, units, resolution, operator, and repeatability before using the result.
- Run the baseline and control — record repeated outcomes with the known-good condition and preserve samples.
- Change one item — roll, cleaning state, guide condition, position, or documented setting; never hide a second change.
- Compare the complete outcome — feed, tension evidence, joint, cut, load damage, and post-handling state.
- Apply the stop rule — keep root cause open if the result does not repeat, measurement is uncertain, or another factor changes the response.
Beyond these screens, interactions can be explored if they’re plausible. Some situations will require a structured multi-factor plan and an appropriate test method along with defining an acceptance basis. This card is designed to stop random adjustments and develop a useful lead; it isn’t designed to turn shop-floor problem solving into an unsupported lab conclusion.
Supplier Escalation Evidence Pack
Supply enough information to reproduce the question: Machine/tool model and serial number, strap material and dimensions, supplier and lot, core and roll condition, documented settings, load build and strap position, environmental and route condition, measurement method, good and failed samples, timestamped photos/video, onset/change history, maintenance state, and controlled-screen result.
Identify what each file conclusively proves. A photo of a roll doesn’t prove tensile strength; it proves the state of the label and the condition of the roll. A photo of the control panel proves the state of the displayed data; it doesn’t prove the force delivered to the package. A photo of a joint doesn’t prove joint strength; it doesn’t prove the state of the joint. A photo of the destination doesn’t prove the mechanism of the change; it proves the state and the time of the change. This prevents numerous attachments from giving false confidence to the reviewer.
Include negatives. Include negatives in routine strapping checks every shift: a stoppage, costly downtime, shift changes, direct sunlight, storage condition, and route transfers should feed structured maintenance and a reliable supply chain. If cleaning didn’t correct the issue, if a second operator reproduced it, if a control roll also jammed, or if the package remained stable during the entire staging process, but loosened after a single segment of a route, these observations remove branches of the next iteration. Negatives are especially useful to suppliers because they reduce repeated inquiries and aid in distinguishing a compatibility review from a machine service request. Negatives are especially useful to suppliers because documented best practices reduce repeated inquiries, support efficient packaging and operational efficiency, preserve customer trust, and keep a compatibility review separate from a machine service request without claiming that a task always extends equipment life.
| Evidence category / points to | Next owner | Do not close until |
|---|---|---|
| Procedure, threading, loading or record gap | Operator lead | The approved method repeats under supervision |
| Measurement, sample, or acceptance ambiguity | QA/packaging engineer | Method and decision rule are fit for purpose |
| Path, gripper, weld, cutter or machine condition | Trained maintenance/OEM service | Safe model-specific work and verification finish |
| Compatibility, undocumented substitution, or lot difference | Procurement and supplier QA | Both samples and the stable comparison are reviewed |
| Load build, route, or unresolved interacting factors | Plant manager/logistics/engineering | Risk, test scope and release authority are agreed |
| Strap/roll identity or visible condition | QA and procurement | Label, lot, sample and stable control are preserved |
| Joint sample and joining-process evidence | QA and maintenance | Failure origin and model-specific process boundary are reviewed |
| Route timeline and checkpoint change | Logistics and packaging engineering | Representative distribution conditions and intended outcome are defined |
| Environmental-condition mismatch | QA and packaging engineering | Conditioning state is recorded and comparisons are valid |
If the current evidence points to a material or specification query, please review the PET Packing strap specification options. The commercial page has sizes, configurations and inquiry form; this page has the troubleshooting pathway. You can also review the pet strapping kit guide if the issue is component compatibility rather than strap material on its own.
Need a supplier review based on real failure evidence?
Send the machine, strap, load, joint, route and comparison details together. The UD Packaging team can then review the material/specification branch without guessing at the machine or application, and identify the questions owned by the supplier, maintenance, QA, or packaging engineer.
For company background and manufacturing context, see About UD Packaging.
10. Frequently Asked Questions
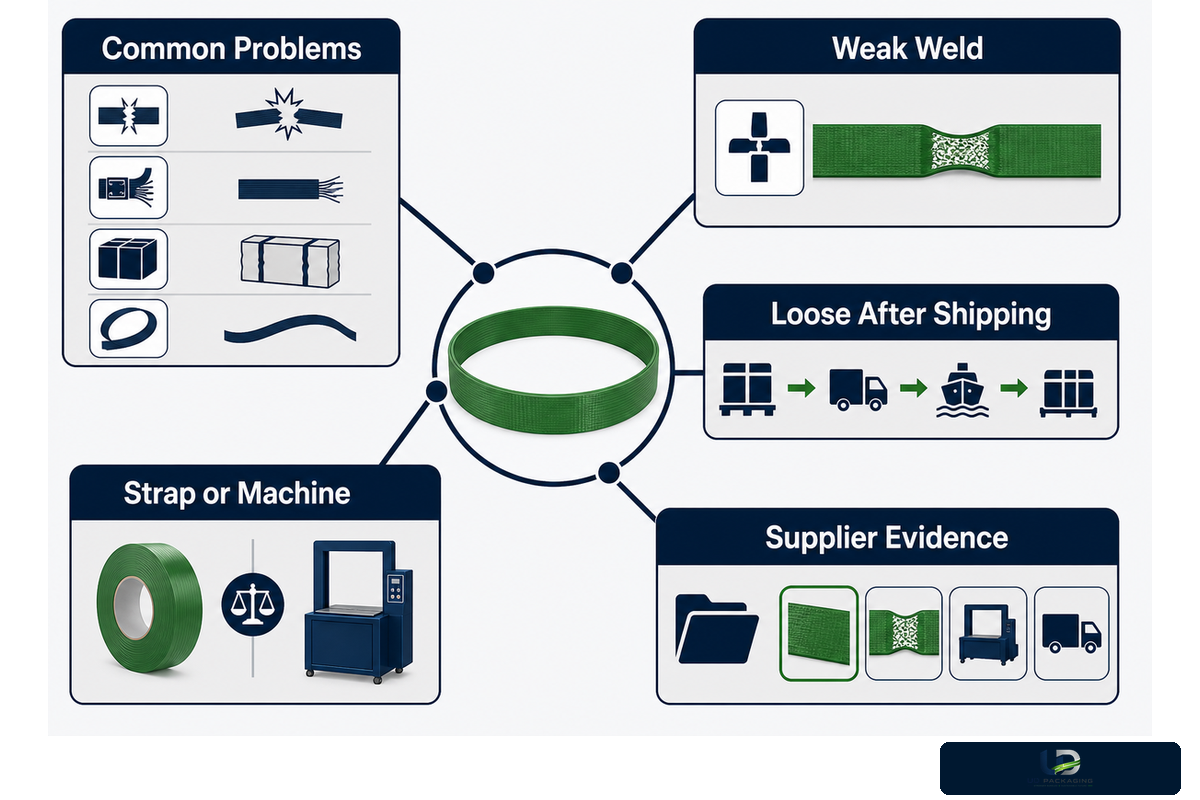
These answers cover the questions buyers and operators ask most often. Each one keeps the same rule: describe the fault, preserve the first evidence, and compare within a stable boundary. If the task enters guarded areas or areas with stored-energy exposure, stop and use the applicable site and machine procedure.
What are the most common PET packing strap problems?
Common faults include poor feeding or tracking, low or inconsistent tension, weak or variable friction welds, rough or incomplete cuts, joint opening, mid-span breaks, longitudinal splits, edge damage, carton crushing, and loose straps after handling. The absence of faults doesn’t indicate the cause. Record the first failed stage, preserve the strap and joint, check measurement (length & width), roll, path, tension transfer, tool, load, and route.
How do I correct a weak or inconsistent friction weld?
Preserve a failed joint, and record the strap lot, width, thickness, machine/tool identity and adjustment settings. Have trained personnel inspect alignment and wear parts. Avoid universal weld time, temperature, and cooling limits because tools, strap construction, and conditions are highly variable.
Why does PET strapping become loose after shipping?
The load may settle and compress, change geometry or size, make the strap move to a smaller perimeter, get damaged by an edge, the joint can slip, or handling of the route can change the position of the package. Compare timestamped evidence for the packing, staging, internal handling and after the representative route has been taken. Record the environmental conditions. A single photograph showing the final condition can’t identify where and when the restraint got lost.
How do I know whether the strap or the strapping machine is at fault?
Load the approved machine with a known good roll after checking the stability of the measurement method. When both rolls fail somewhere at an identical path or tool point with a known good roll, then it’s likely that the issue is with the equipment/process. If one lot consistently fails while the control passes on the same machine, load, environment, and method, preserve both rolls for supplier review. This is a screening result if other factors are likely to be interacting.
What evidence should I send a PET strap supplier?
Send the machine or tool model and serial, strap material, width, thickness, finish, core, supplier and lot, roll/feed/joint photos, failed samples, one good and one unsuccessful cycle, current documented settings, load dimensions and strap position as well as the environmental conditions and the route along with the method of measurement, the history of the onset, the state of the maintenance, and the controlled comparison. This allows the supplier to answer the lot, process, measurement and application questions.
References & Sources: Method Boundaries
Public sources are used to define method, measurement, conditioning, safety and route-test boundaries. This guide doesn’t reproduce paywalled standards nor replace an OEM manual containing instructions for machine operation. It doesn’t prescribe maintenance for a specific machine nor certify a package for a route. The transparent operational cards are editorial syntheses developed from approved site procedures and acceptance criteria.
- ASTM D3950-23, Standard Specification for strapping, Nonmetallic (and Joining Methods)
- ASTM D4332-22, Conditioning Containers, Packages, or Packaging Components for Testing
- OSHA, Control of Hazardous Energy (Lockout/Tagout)
- HSE, Maintenance of Work Equipment
- ISTA, Test Procedures
- Journal of Applied Packaging Research, Load Securement and Packaging Methods
- NIST/SEMATECH, One Factor at a Time and Interaction Limits
- NIST/SEMATECH, Measurement Process
Final takeaway
Do not ask “Is the strap bad?” first. Ask which stage failed, whether the measurement can be trusted, what remained constant, what evidence would disprove the leading hypothesis, and who owns the next safe decision.


![Plastic Strapping Types: PP vs PET [Buyer Guide]](https://udpackaging.com/wp-content/uploads/2026/08/plastic-strapping-types-featured-150x150.png)